Living in a world of buffering videos and dropped connections can be frustrating. Luckily, TP-Link Deco mesh Wi-Fi systems offer a convenient solution, extending coverage through several coordinated Wi-Fi access points. This guide will walk you through the main setup decisions, from downloading the app to placing the units and finalizing your network configuration.
Before You Begin:
- Identify your Deco model: Knowing your specific Deco model is crucial, as the setup process might vary slightly between models. Check the box or consult the user manual for confirmation.
- Download the Deco app: Search for "TP-Link Deco" on the Google Play Store or App Store and install the app on your smartphone or tablet.
- Gather your equipment: You'll need your Deco units, an Ethernet cable, your modem, and your smartphone or tablet with the Deco app installed.
Setting Up the App and Connecting the Deco Units:
- Launch the Deco app and create a TP-Link ID, or log in if you already have one.
- Select your Deco model from the list.
- Grant the permissions requested by your phone and app. iOS Local Network access and Android discovery/location requirements differ; some models also use Bluetooth.
- If the app requests a modem restart, follow your provider’s instructions. Check before disconnecting batteries from equipment that also supplies telephone or emergency service.
- Connect one of your Deco units to your modem using an Ethernet cable. Plug the other end of the cable into the WAN/LAN port of your Deco unit and the corresponding port on your modem.
- Power on both your Deco unit and your modem. Check the model’s LED guide. TP-Link’s example setup uses pulsing blue for a unit ready to configure; solid blue or white is not a universal initial state.
Optimizing Deco Placement:
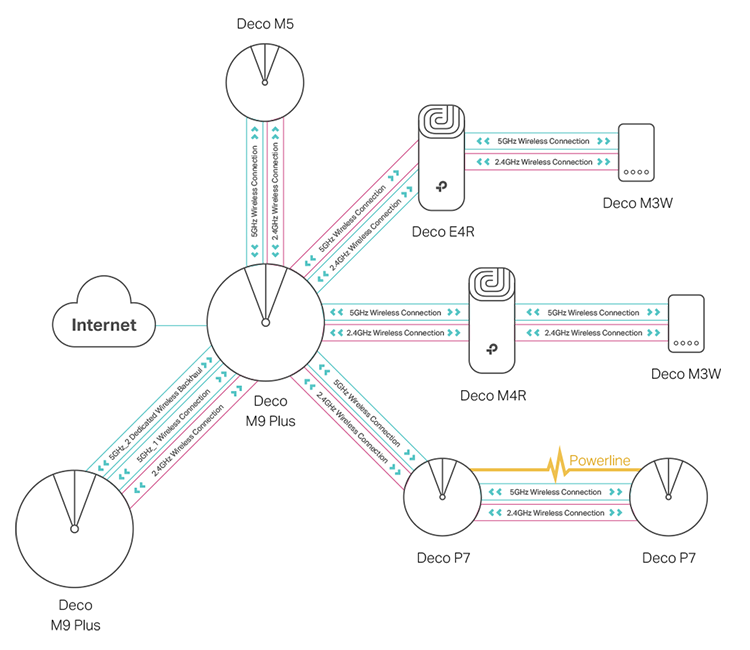
For optimal performance, consider the following when placing your Deco units:
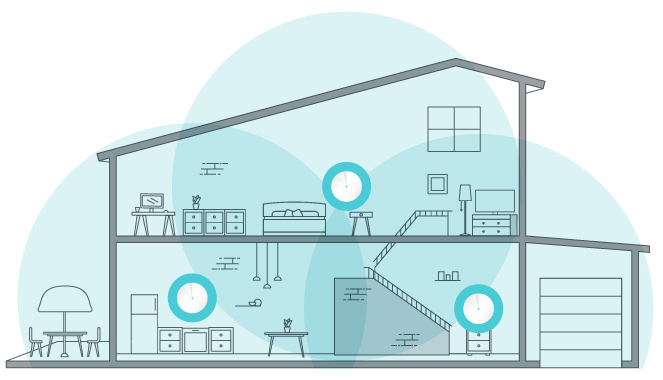
- Central location: Place your main Deco unit in a central location within your home, away from walls and obstructions like metal objects or large appliances.
- Even distribution: Place wireless satellites between the main unit and the rooms needing coverage, while they still receive a useful upstream signal. Walls and floors make a universal spacing rule unreliable.
- Minimize interference: Keep your Deco units away from cordless phones, microwaves, and other electronics that might emit interference.
Finalizing Network Setup:
- Once your model is ready for configuration, follow the app’s instructions to complete setup. This typically involves choosing your network name (SSID) and setting a strong password.
- The app will guide you through connecting your other Deco units to the network. Some units supplied together join automatically after the main network is configured; others need the app’s Add Deco procedure. Confirm each appears online in the same network.
- Wait for the app to indicate that your network setup is complete. This might take a few minutes.
Activating Your Network:
- Once the setup is complete, you can connect your devices to your new Deco Wi-Fi network using the network name and password you created earlier.
- The Deco app offers various features, including parental controls, guest network creation, and network optimization tools. Explore these features to personalize your network experience.
Additional Considerations:
- Consult the TP-Link website or user manual for troubleshooting tips in case you encounter any issues during setup.
- Update the firmware of your Deco units regularly to ensure optimal performance and security.
- TP-Link offers customer support if you require further assistance.
By following these steps and considering the placement recommendations, you have a starting configuration to test in the rooms and with the devices that matter to you.
Choose Router or Access Point mode
Decide which device will manage your home network. Router mode suits a Deco taking that role. If an existing router will continue routing and assigning addresses, complete the initial Deco setup, then use More → Advanced → Operation Mode to select Access Point and follow the reboot prompt. AP mode disables some gateway features, including Deco address reservations.
The main Deco needs an Ethernet uplink. AP mode does not turn it into a universal wireless repeater for another router. Keep the old router settings and ISP credentials until the replacement works. Behind a working router, Dynamic IP is normally appropriate; a direct provider connection may need PPPoE credentials, static addressing or VLAN settings. Confirm these with the provider instead of guessing. See the existing-router guide and AP setup instructions.
Settings worth checking after setup
Available menus depend on the model, operating mode and firmware. Change one setting at a time so that an improvement or compatibility problem can be traced to its cause. Record the previous value before changing it.
| Setting | Useful check |
|---|---|
| Fast Roaming | Try it with devices that move between rooms. Both sides need compatible support; disable it for troubleshooting if a client stops connecting. |
| IoT network | Select supported bands and encryption for older gadgets. A separate IoT SSID does not itself isolate them from the main network. |
| Address reservation | Reserve a printer or server address on the device providing DHCP. In AP mode, that is the upstream router. |
| DNS | Choose resolvers for the intended policy. A public secondary resolver can let clients bypass local DNS filtering. |
Fast Roaming compatibility varies with clients; it cannot promise a fixed handover time or prevent every dropped call. TP-Link documents Device Isolation separately from the IoT network. Test any isolation against the access your controller needs. Do not assume features shown in an app screenshot exist on every Deco.
Verify Ethernet backhaul and wiring
Add the satellite units through the app before wiring them. In Router mode, their Ethernet connections belong downstream of the main Deco’s LAN side. AP mode permits the upstream router’s LAN to connect multiple Decos. The official Ethernet backhaul guide shows both layouts.
Open a satellite’s details in the network map and check its signal source. An Ethernet indication identifies backhaul type, not a measured Gigabit or multi-gigabit transfer rate. Ports, cable negotiation, switches and the other endpoint still limit transfers.
If it remains wireless, try a different port and cable, then connect the two Decos directly to isolate the switch. Follow the vendor’s guidance for multicast and loop-detection problems. Avoid disabling protective settings across the network without understanding the topology. Connection Preference, where supported, is a preference to verify; it cannot keep a client connected to an unavailable unit.
Test before final placement
Compare the same client beside the main Deco and in each important room. Note the connected node, placement, backhaul type and download/upload result. Then try a real call, stream or local file transfer. A local test and an internet speed test answer different questions.
Reconnect your printer, work laptop and smart-home controller and check their usual tasks. If you reused the old Wi-Fi name while both systems are powered, confirm which one the device joined. Keep the first results as a baseline. A satellite deep inside a dead zone can show strong Wi-Fi to a nearby phone while having a poor upstream link itself; move it closer and repeat the comparison before permanently mounting it.
The official first-time setup guide provides example screens. Check your hardware version’s manual and firmware notes when its LEDs or menus differ.