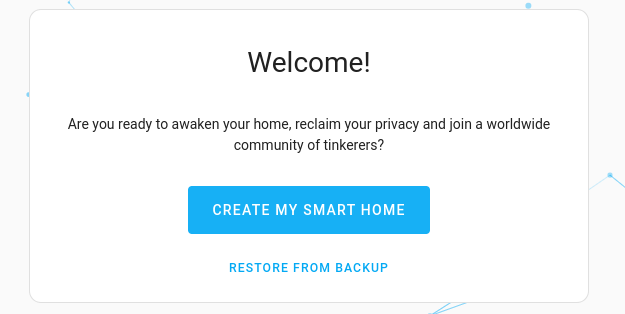
Over the last couple of days we looked at installing Home Assistant on a Raspberry Pi, as well as via a Docker Container. Once it is installed, it still needs to be set up and configured. Today we will look at setting up Home Assistant after successfully installing it. If you have trouble installing Home Assistant, look at their official Installation Troubleshooting Guide. But if installation was successful, you’re now ready to bring all your devices together. The screenshots below show the original onboarding sequence. Current releases may use different button labels or move device discovery until after the welcome flow; the same tasks still apply. Use the current onboarding guide alongside the retained screenshots.
Step 1: Access Home Assistant via Your Browser
Once Home Assistant is installed, you’ll need to open it on your computer, tablet, or phone.
- Open a web browser (like Chrome, Safari, or Edge).
- Use the address from your installation guide. For Home Assistant OS, try
http://homeassistant.local:8123. For Container, use the Docker host’s network address and port 8123.127.0.0.1only works when the browser is on the computer running the service; on your phone it refers to the phone itself. - Press Enter or click go.
This will bring you to the Home Assistant onboarding screen. If you run into any issues accessing it, make sure the device you’re using is connected to the same network as the one running Home Assistant.
Home Assistant OS may show a preparation screen while it downloads and starts the required software. Allow time for that process rather than repeatedly disconnecting power. A Container installation starts from its pulled image, so do not expect every installation type to display the same preparation screen.
Step 2: Set Up a New Home or Import a Previous One
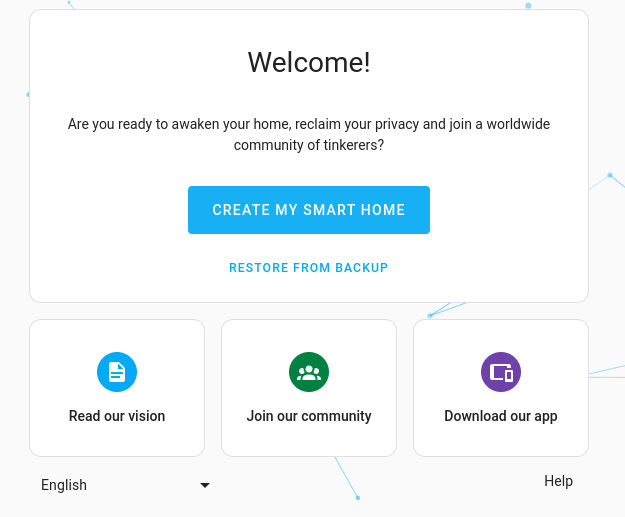
On the first screen, you’ll be asked to either:
- Create a new Home Assistant setup.
- Import an existing setup (if you’ve used Home Assistant before).
If this is your first time using Home Assistant, choose the new-home option. The retained welcome screenshot and current documentation call it “Create my smart home”. Other versions may use a similar new-home label. This will start fresh, letting you customize everything to your liking.
If you are recovering a previous installation, choose the restore-from-backup option rather than creating a separate new home. Keep the backup file and any required encryption key available, and follow the restore procedure for your installation type.
A fresh installation asks you to create the local owner account. This is an administrator account with control over the installation. Store its credentials securely and choose a lowercase username without spaces. It is separate from a device manufacturer’s cloud login.
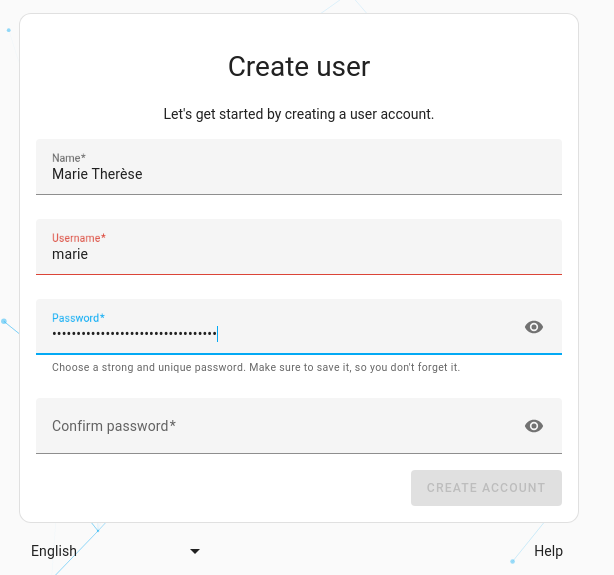
Step 3: Set Up the Location of Your Home
Next, you’ll need to tell Home Assistant where your home is located.
- On the map that appears, drag the pin to your house’s location.
- Confirm the correct time zone.
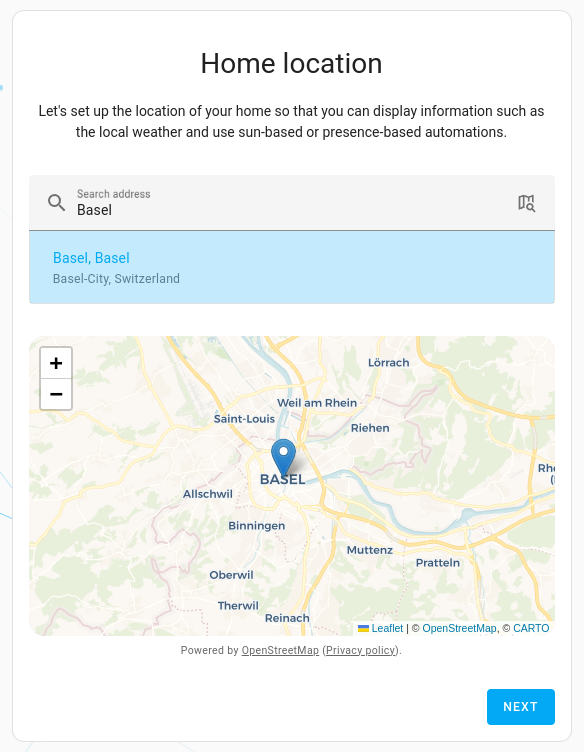
Why is this important?
- Home Assistant uses this information to control devices based on sunrise, sunset, and time-specific automations.
- For example, your lights could automatically turn on at sunset or your thermostat could adjust at specific times.
You can adjust the location later. A deliberately approximate location also affects the home zone and location-dependent calculations; check the result before using presence or sunrise as an automation trigger. Confirm the unit system and time zone rather than relying on automatic IP geolocation.
Step 4: Select Privacy Options
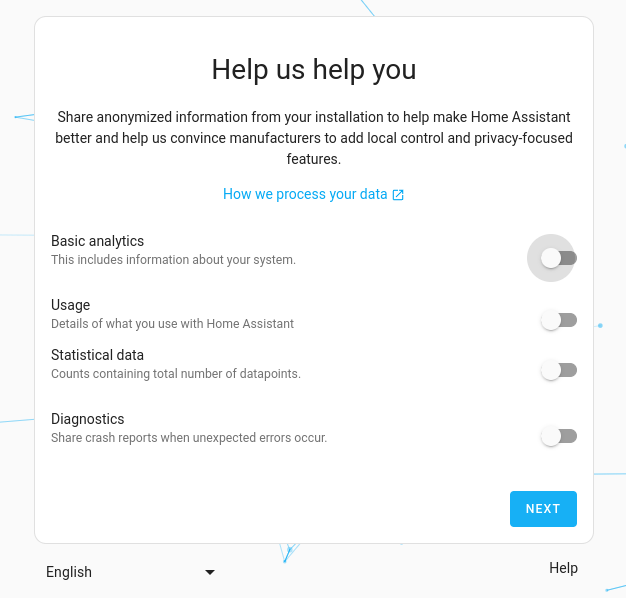
Now you’ll set up how much data Home Assistant can share with its developers.
You’ll be given options like:
- Basic and usage analytics: Optional information about the installation and integrations helps the project plan development.
- Statistics and diagnostics: These are separate options. Diagnostics concern crash reports on supported components, rather than a promise that all your application logs are shared.
If you’re comfortable, enabling these can contribute to a better experience for everyone. Sharing analytics is disabled by default. Choosing not to opt in does not stop a cloud-based device integration from communicating with its own provider. Review the analytics options separately from each device’s privacy requirements.
Step 5: Set Up the Auto-Detected Devices
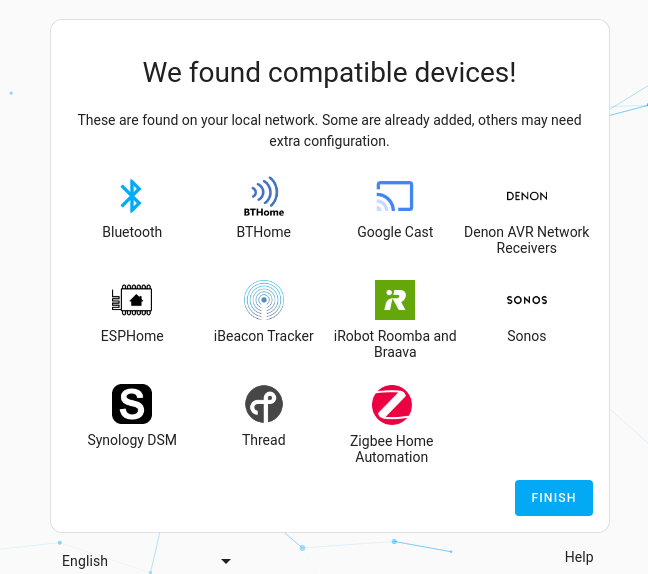
Some supported devices are discovered automatically, while others need an integration, a hub or manual configuration. In current releases, finish onboarding and look under Settings → Devices & services for discovered integrations. The older screenshot below shows discovery within the initial flow.
- A list of detected devices will appear.
- For each device:
- Confirm if you want to integrate it with Home Assistant.
- Provide any necessary login credentials or setup details (e.g., your Wi-Fi camera app’s login).
Why is this step important?
This is where Home Assistant becomes your central hub. Start with one device so you can verify its controls and reported state before adding many integrations. Don’t worry if some devices don’t show up right away — you can add them manually later.
What’s Next?
After completing these steps, Home Assistant is ready to go! From here, you can:
- Explore the dashboard to see and control your devices.
- Start creating automations, like turning off all lights when you leave home.
- Customize your setup to match your lifestyle.
Setting up Home Assistant may seem a little daunting at first, but by following these simple steps, you’ll be well on your way to creating a smarter, more convenient home. Enjoy your new setup!
Understand the objects you are configuring
The official terminology guide explains how integrations, devices and entities fit together. An integration connects Home Assistant to a platform or service. A device groups related entities and can represent a physical or logical unit. An entity exposes a particular state, control or function; it is not always a sensor attached to physical hardware.
| Object | Example | Useful distinction |
|---|---|---|
| Integration | Philips Hue | Connection to the bridge/platform |
| Device | Living room light | Groups the light’s related entities |
| Entity | light.living_room | The particular controllable light in an automation |
| Area and floor | Living room, downstairs | Areas group devices/entities; floors group areas |
| Zone | Home or Work | A geographical region used for presence, rather than an indoor room |
| Blueprint | A reusable motion-light template | Needs suitable inputs and review before enabling |
Give devices useful room-based names, then inspect their entities. A smart plug may expose an on/off control and power readings; a dashboard displaying one does not prove the other is working. Test a harmless command, observe the physical response, and check that the reported state returns correctly.
Practical first-day tasks
- Stabilise access: A DHCP reservation on the router can give the host a consistent address. Use the correct host or VM network interface and record the address. A reservation helps reachability; it cannot guarantee every integration survives every outage.
- Learn the default tools: Use the built-in dashboard and official integrations first. Advanced Mode exposes additional settings, but it does not install a full configuration-file editor. Home Assistant OS can install supported apps, formerly called add-ons; Container users manage companion services and file access on their host.
- Add custom software selectively: HACS is optional. It helps manage community integrations and dashboard resources, which have their own maintenance requirements. It is not a required onboarding step or a replacement for the Home Assistant OS app store. Check a project's documentation and make a backup before adding it.
- Prepare recoverable backups: The current backup integration works across installation types. Under Settings → System → Backups, configure a schedule, retention and supported destinations. Download the emergency kit for encrypted backups and keep it outside the device being backed up.
Read the backup guide and check a completed backup at its destination. Home Assistant OS network-storage settings are distinct from a Container host’s storage configuration. For Container, protect the host’s Compose configuration and any separate databases or companion containers as well. A Home Assistant backup does not recreate that entire host. Restore duration depends on data size, hardware and the recovery process; there is no universal three-minute recovery.
Verify one small automation
Choose a reversible example, such as turning a lamp on at a specified time. Confirm the time zone, entity and action first. Then test the trigger separately from manually running the action: a working action does not establish that the trigger or conditions are correct. Keep manual control available while you learn.
After a normal restart, check that the dashboard loads, the device reconnects and its state is current. If discovery finds nothing, consult the specific integration instructions before assuming the device is unsupported. Guest-network isolation, missing radio hardware or a cloud-account requirement can each explain different failures. Record the installation type and integration name when troubleshooting so advice matches your setup.