We have explored many Raspberry Pi projects, including the Pico 2 and Pico 2 W. Compute Module 5 takes a different approach: it puts Raspberry Pi 5-class computing into a compact module intended for a carrier board rather than providing a complete set of desktop connectors.
Raspberry Pi Ltd launched CM5 on 27 November 2024. It can be a useful platform for custom products, prototypes and space-saving projects. The important question is whether that flexibility solves your problem, because the module alone is not a ready-to-use replacement for a complete Raspberry Pi 5.
What is a Compute Module?
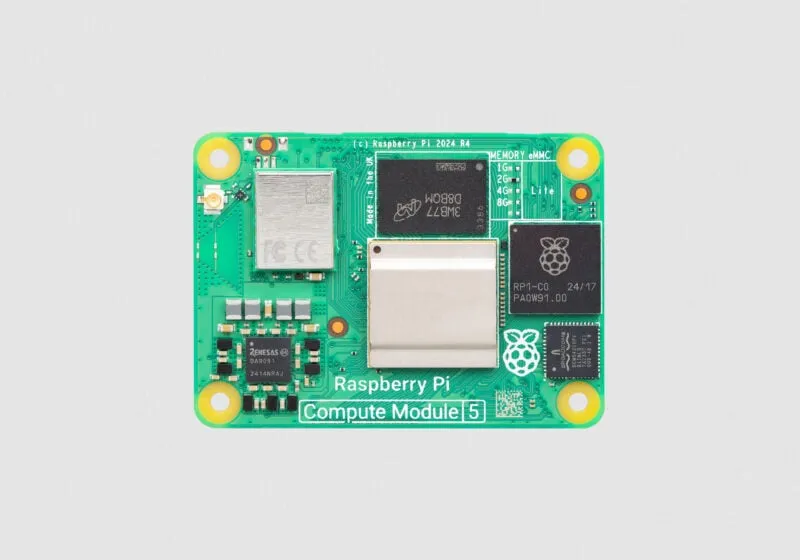
A system on module contains the processor, memory and supporting electronics in a small board. CM5 connects through two 100-pin high-density connectors, which carry power and interfaces to a separate carrier board. That carrier supplies the connectors and additional circuitry your product needs.
This allows a designer to place ports on one edge, build a device around a particular enclosure or omit unnecessary connectors. It does not make the module's underlying interfaces unlimited. Adding a network controller or several storage sockets requires suitable circuitry, software support, power and bandwidth; it does not create extra native PCIe lanes.
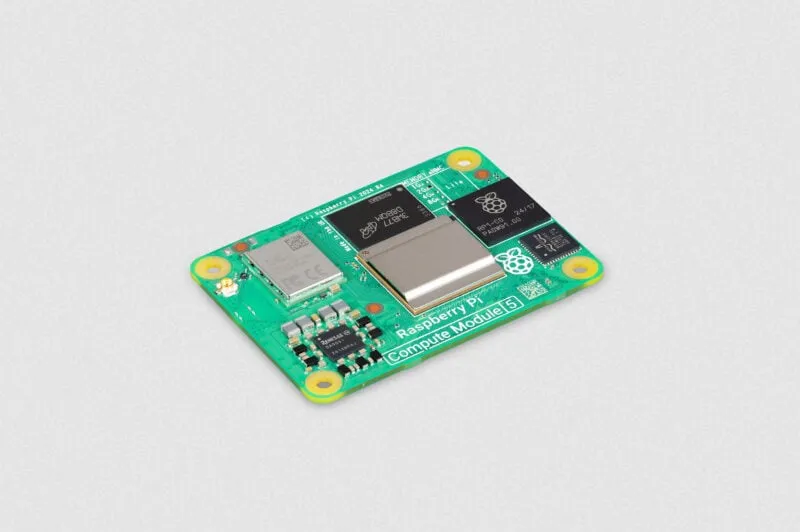
The main hardware and variant choices
CM5 uses the Broadcom BCM2712 with four 64-bit Arm Cortex-A76 cores at 2.4 GHz. The current product range lists 2, 4, 8 and 16 GB RAM, with no eMMC on Lite variants or 16, 32 and 64 GB eMMC options. Wireless variants offer dual-band 802.11ac Wi-Fi and Bluetooth 5.0. Choose the actual SKU and confirm local availability rather than assuming every combination is stocked.
The launch article listed 2, 4 and 8 GB memory and expected 16 GB versions in 2025; the current range includes 16 GB. That distinction matters when reading a launch-era description. Processor architecture, memory capacity and storage capacity are separate decisions: extra RAM does not increase the number of cores or provide more permanent storage.
The module supports two HDMI outputs up to 4K at 60 Hz and two four-lane MIPI camera/display interfaces. The HDMI outputs and MIPI interfaces are different paths; a camera/display description should not imply that all attached devices can use any connector interchangeably. Check the carrier's connectors and supported camera or display cables.
CM5 versus a standard Raspberry Pi 5
| Decision | Compute Module 5 | Standard Raspberry Pi 5 |
|---|---|---|
| Connections | Interfaces exposed through a compatible carrier board. | Fixed onboard desktop and expansion connectors. |
| Storage choice | Lite or onboard eMMC; carrier-dependent external storage. | Removable/external storage appropriate to the board and accessories. |
| Physical design | Useful when port placement, enclosure shape or integration matters. | Simpler starting point when the existing board layout fits. |
| Total project cost | Include carrier, power, storage, cooling, case and engineering effort. | Include the accessories needed for the intended workload. |
The CM5 is about customization; the ordinary Pi 5 is easier to assemble around its existing ports. Neither is entirely accessory-free. For a single home service, a conventional board may avoid extra complexity. For a product prototype, the carrier approach can make the physical design considerably more practical.
What the official IO Board provides
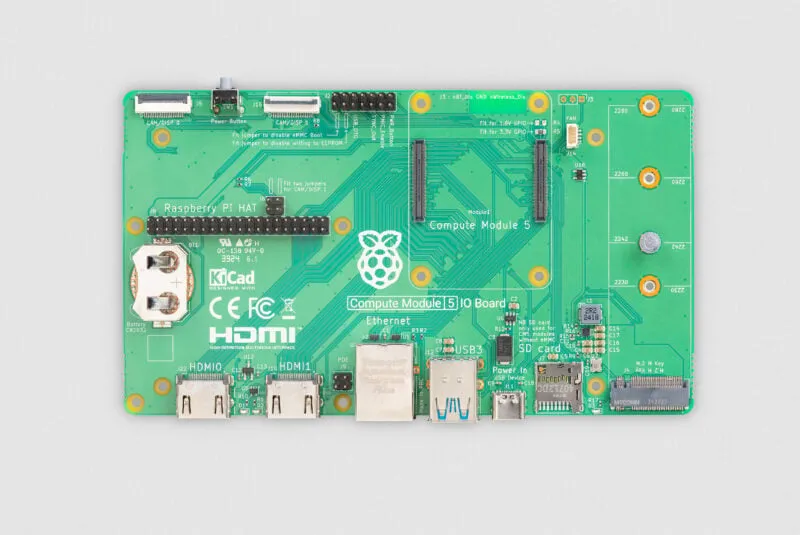
The official CM5 IO Board is a development platform and a reference for custom carriers. It provides a 40-pin GPIO header, Gigabit Ethernet, two USB 3 sockets, two full-size HDMI connectors, two MIPI connectors, an M.2 M-key PCIe socket, fan connector and RTC battery socket. PoE power requires the appropriate additional PoE+ HAT+; the Ethernet socket alone does not provide it.
The M.2 socket accepts the listed 2230, 2242, 2260 and 2280 form factors. Confirm electrical protocol and the supported drive, not just its length: the PCIe socket should not be treated as a universal SATA M.2 connector. The microSD slot is for CM5 Lite; modules with eMMC do not gain a second ordinary boot-storage slot simply because the carrier has one.
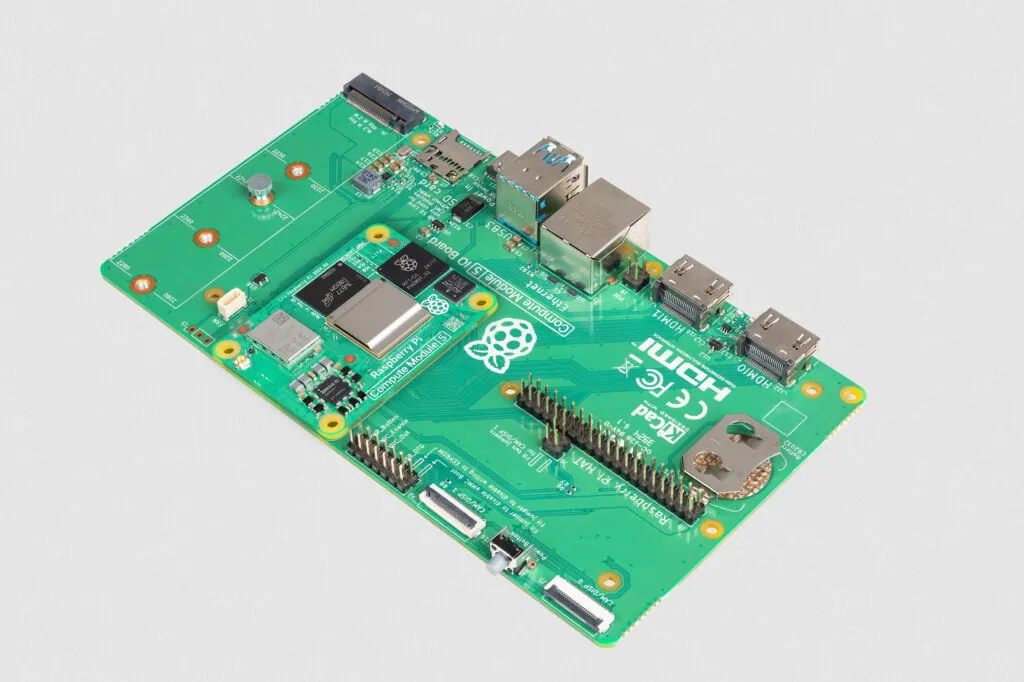
Start by validating an application on a supported IO Board before designing a custom PCB. That provides a reference when distinguishing software problems from carrier wiring or power faults. For cluster boards, obtain explicit CM5 support for the board revision and adapter. Several modules remain separate computers; their RAM and cores are not automatically pooled into one larger machine.
CM4 compatibility needs more than a matching footprint
CM5 retains CM4's broad form factor, but mechanical fit does not establish full functional compatibility. Raspberry Pi lists CM5 on CM4IO and CM4 on CM5IO with reduced functionality. The transition documentation explains changed pin assignments and electrical behavior, including USB, MIPI and power/reset signals.
For an existing product, ask the carrier supplier which interfaces work with CM5 and what changes are needed. Check connectors, current capacity, reset behavior, firmware and drivers. A higher-current power supply alone cannot repair a mismatched signal assignment. Keep the existing working module available until the replacement has been validated in the complete device.
For new PCB work, use the current CM5 datasheet and official reference design. For example, its PCIe guidance specifies 90-ohm differential routing, not a generic 100-ohm rule applied to every high-speed interface. USB, HDMI and PCIe require their own routing and control-signal requirements. A simplified blog table cannot replace signal-specific design review or final product testing.
Storage and useful bandwidth expectations
Lite removes onboard eMMC so the carrier and boot configuration determine the storage arrangement. eMMC versions offer soldered storage that can be convenient in an integrated product. That is a physical design advantage, not a promise of unlimited write endurance, tamper resistance or immunity from corruption.
CM5 officially exposes PCIe Gen 2 x1. Its datasheet says Gen 3 operation is unsupported and may not work reliably. Plan around the supported configuration rather than promising doubled storage throughput. A carrier with several drives or an extra network adapter must share the available upstream bandwidth as its design requires.
For storage-heavy workloads, consider write frequency, available capacity, recovery access and backups. An SSD does not eliminate flash wear. A faster local drive also does not turn the IO Board's Gigabit network connection into a faster link. Our Raspberry Pi SSD overview discusses the separate drive and adapter choices.
Provisioning eMMC without confusing USB ports
Writing eMMC differs from inserting a removable card into a reader. On the official CM5IO, the documentation uses the J2 boot-disable jumper and the J11 USB-C slave connection to a host computer. Follow its board-specific instructions; the power connector and slave connection serve different purposes.
Use current Raspberry Pi USB boot tools and the Mass Storage Gadget option for CM5. The old firmware-based mass-storage method is not the appropriate CM5 path. Supported host procedures differ across Linux, macOS and Windows, so use the official instructions for your host rather than applying one command to all platforms.
Once the target appears, identify its capacity carefully in Raspberry Pi Imager: imaging erases the selected device. After successful writing, complete the documented eMMC boot procedure, remove the boot-disable jumper, disconnect the slave cable and power-cycle as instructed. Keep a known-good image and a recovery method before deploying an inaccessible device.
Power, cooling and enclosure revisions
Check power for the whole system, including storage, USB peripherals and carrier electronics. The CM5 datasheet's design budget and typical current examples are not measurements of your finished product. A supply that boots an idle prototype may still be unsuitable under simultaneous storage and CPU load.
CM5 has less passive heat sinking than a standard Pi 5. Its thermal management reduces clock speed to control temperature, so validate sustained operation in the intended enclosure and ambient conditions. The official cooler and fan-equipped case are options; do not assume silence or full sustained performance merely because a metal box is used.
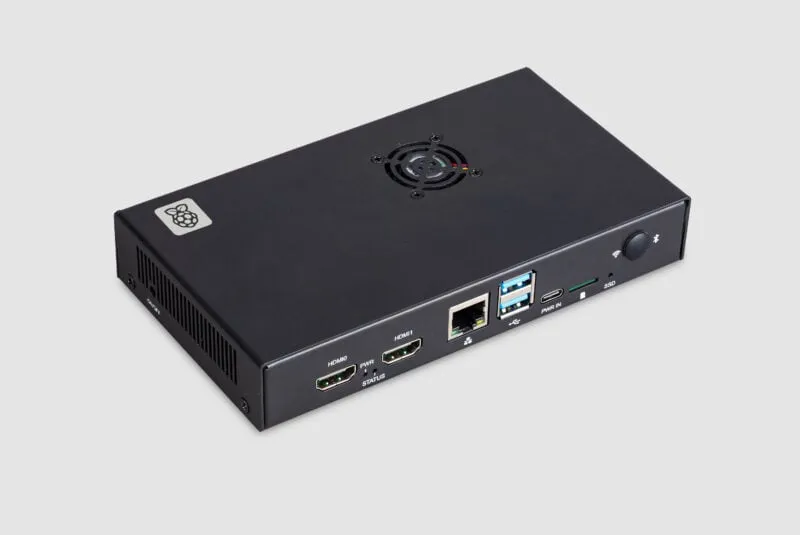
Case versions differ. Current documentation says the original case cannot accommodate every listed accessory simultaneously, whereas version 2 provides more clearance, including space for the cooler and fan together. The original photograph below shows the case concept; confirm the revision and accessory fit before ordering.
Projects and a sensible starting point
Home automation hubs, media players, sensor gateways and custom hardware prototypes remain useful CM5 project ideas. Each needs an appropriate software image and interfaces. Use compatible Arm software and current camera/display APIs; the transition guide explains that legacy firmware camera and display APIs are not supported on CM5.
Define the workload and physical requirements first, then select the module SKU and carrier together. Test boot, recovery, cooling, storage and every required interface before committing to a custom enclosure or multiple nodes. CM5 is a powerful, flexible option when integration matters. Pairing it with the official IO Board makes experimentation approachable without promising that one module suits every project.
For historical launch details, read the official Raspberry Pi launch article.