In a world where privacy and control over personal data are increasingly important, FreedomBox stands as a beacon for anyone who wants to take back control of their online life. Designed to offer secure, self-hosted services, FreedomBox turns your hardware into a private server that protects your digital privacy and autonomy. One of the best things about FreedomBox is that it can easily run on a Raspberry Pi, offering an affordable and simple solution for home users.
What is FreedomBox?
FreedomBox is free and open-source software that turns a small computer into a powerful personal server. Think of it as a digital toolbox that empowers you to take charge of your online experience. It prioritizes privacy and security, giving you more control over your data and how you communicate online.
FreedomBox on a Raspberry Pi? Absolutely!
The beauty of FreedomBox is that it's not limited to expensive hardware. It can run on a Raspberry Pi, a tiny and affordable computer that's perfect for tinkering and creating DIY projects. With a Raspberry Pi, you can set up your own FreedomBox at home for a fraction of the cost! The Raspberry Pi is a compact, low-power computer that's ideal for running lightweight server software like FreedomBox. By combining a Raspberry Pi with FreedomBox, you create a personal server that is under your control, with security and reliability depending on setup and maintenance. Include storage, an appropriate power supply, a case and any backup media in the budget, rather than only the board price.
Hardware Compatibility
FreedomBox is highly versatile and can run on a variety of hardware, including:
- Single-board computers like the Raspberry Pi.
- Virtual machines on PCs.
- Dedicated hardware like the FreedomBox Pioneer (pre-configured hardware).
- Old computers repurposed for private server use.
I find a supported Raspberry Pi appealing because of its size and modest power needs. Check the exact model: the current official download list includes Pi 2, Pi 3 Model B/B+ and Pi 4 Model B. It does not justify assuming every “Pi 3 or later” board can boot the same image. An existing supported Debian machine or VM can also be a practical starting point.
What can FreedomBox do?
FreedomBox provides an interface for installing and managing apps that work together to give you more control over your digital life. Here's a quick rundown of some of the cool things you can do with FreedomBox:
- Secure communication: FreedomBox allows you to set up your own email server and instant messaging service, giving you control over the server. Encryption and the privacy of messages still depend on the service and clients you configure.
- Cloud storage done right: Ditch the big corporations and store your files and documents on your own secure cloud server with FreedomBox.
- Freedom to browse: Tools such as Tor and Privoxy can support more private browsing when the client is configured to use them. Installing FreedomBox does not automatically route every device through them or guarantee anonymity.
- Your own VPN: A VPN can provide an encrypted connection from a client to your home server. Its routes determine which traffic uses the tunnel; websites and accounts can still identify you.
- Ad-blocking superhero: Privoxy provides configurable web-proxy filtering. That is different from a universal network-wide ad blocker, and encrypted content or applications can limit what a proxy can filter.
Software Included with FreedomBox
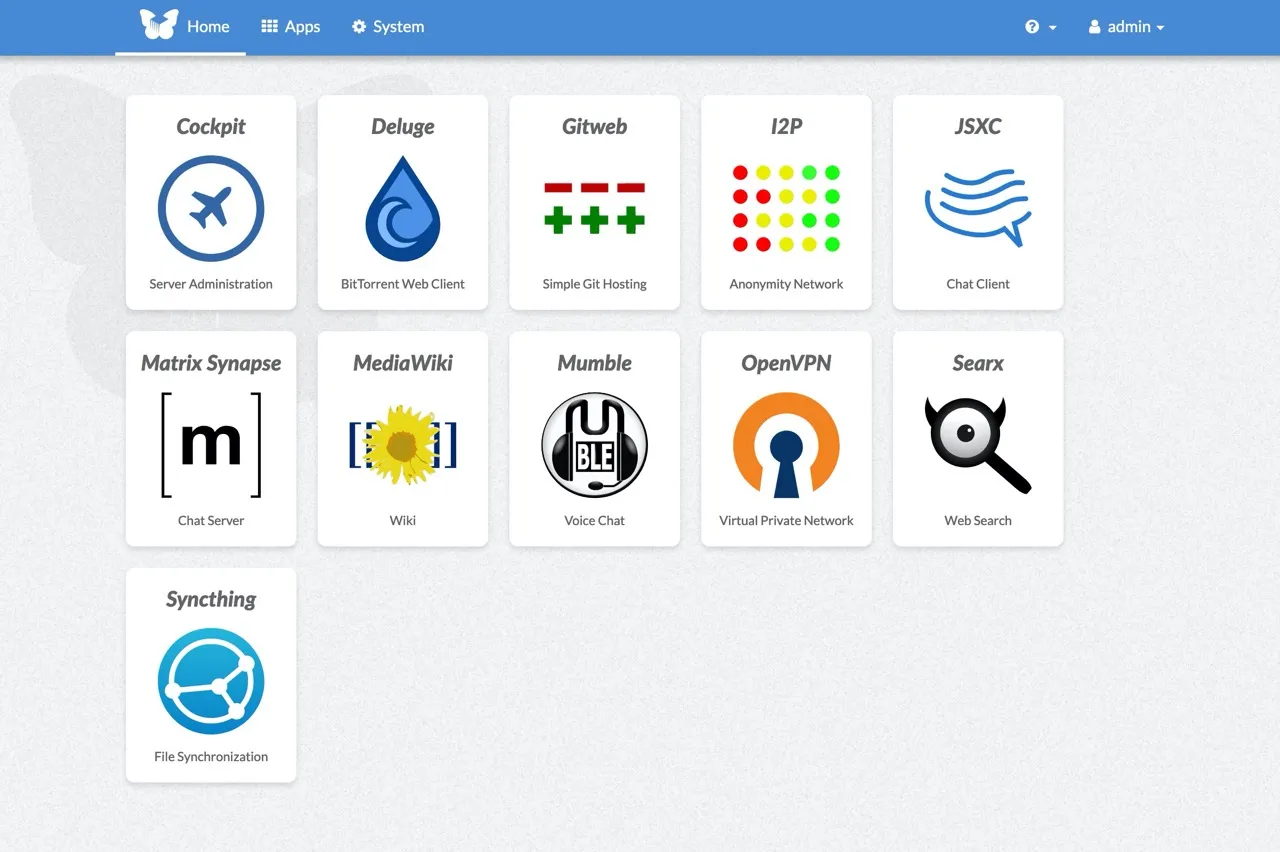
The official app catalogue includes the services below. Most are installed when you choose them, rather than all running immediately after first boot. Availability can also depend on the FreedomBox/Debian version and hardware.
- Tor – Can provide Tor services, including a proxy for suitably configured clients. Avoid treating it as guaranteed anonymity.
- OpenVPN – Allows you to create a secure virtual private network (VPN) to connect to your home server remotely.
- Nextcloud – Provides file storage and collaboration. The current integration is marked experimental in the project source, uses an upstream container and follows an independent update cycle; read its status before relying on it.
- Let's Encrypt – Automates SSL certificate creation, providing HTTPS encryption for your websites.
- Matrix Synapse – A server for the Matrix messaging network. End-to-end encryption depends on room/client configuration, not simply installing Synapse.
- MediaWiki – Lets you create your own wiki platform, perfect for collaborative projects.
- WordPress – Allows you to easily host and build a blog or website.
- Apache – A widely-used web server for hosting websites and web applications.
- Transmission – A BitTorrent client for managing downloads. A web interface and self-hosting do not hide peer activity or make a torrent private.
- Deluge – Another BitTorrent client providing file-sharing capabilities through torrents.
- SSH Server – Allows secure command-line access to your FreedomBox from other computers.
Installing FreedomBox on a Raspberry Pi
Now that you have a better idea of what FreedomBox can do, let’s walk through how to set it up on a Raspberry Pi.
What You’ll Need:
- A specifically supported Raspberry Pi model and its matching FreedomBox image; Pi 4 Model B is documented by the project
- A suitable microSD card or documented boot device with capacity for the selected image, apps and data; leave room for updates
- A computer with an SD card reader
- A stable internet connection
- Power supply and Ethernet cable for the Raspberry Pi
Step-by-Step Guide:
- Download FreedomBox Image:
- Head over to FreedomBox’s Pi 4 hardware instructions and follow the download link for your exact board. Choose a stable image for ordinary use; testing images are intended for people prepared to handle changes. The official download page also describes verifying downloaded images.
- Prepare the SD Card:
- Insert your microSD card into your computer.
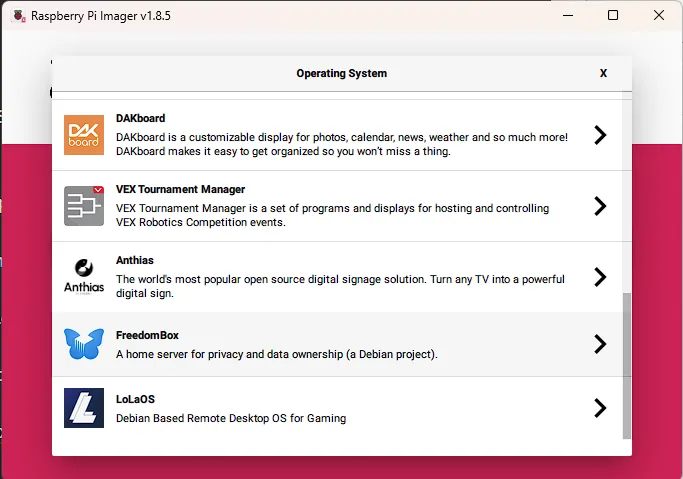
- Use a tool like Raspberry Pi Imager or balenaEtcher to write the selected FreedomBox image onto the intended storage device. Writing erases that device, so confirm its capacity/name and back up anything needed before proceeding.
- If you decide to use the Raspberry Pi Imager, there is no need to download the image first (step 1) when the matching FreedomBox image is available in Imager’s catalogue. The pictured Imager 1.8.5 lists it under the specific-purpose OS selection; menu wording can change. Confirm the target board and stable/testing choice. If it is not offered, select the verified downloaded image through the custom-image option.
- Insert the SD Card:
- Once the image is successfully flashed, remove the SD card from your computer and insert it into your Raspberry Pi.
- Connect Raspberry Pi to Power and Internet:
- Connect Ethernet to your router before powering on the Pi with an appropriate supply. Keep the setup computer on the same trusted local network; a guest network may prevent access.
- First Boot and Initial Setup:
- Give the first boot time to finish; the official quick start suggests allowing about ten minutes on some machines. Then try
http://freedombox.local/from a device with mDNS support, or find the Pi’s assigned address in the router and open that local address. Lack of HDMI output alone does not establish failure on a headless server. - The initial interface may show a self-signed certificate warning. Confirm that the address is the Pi you just installed on your own network before accepting that specific first-setup exception; do not dismiss unrelated warnings. Start Setup and create a strong administrator account. A package installation on existing Debian can additionally request its generated first-boot secret.
- Give the first boot time to finish; the official quick start suggests allowing about ten minutes on some machines. Then try
- Configure Services:
- Once logged in, choose one app from the Apps page, install it and verify it locally before adding several more. Use a separate ordinary account where practical for day-to-day activity rather than using the administrator account for everything.
Tips and Pointers for Using FreedomBox
- Keep Your System Updated: Always ensure FreedomBox is up to date. Regular updates will help keep your system secure.
- Use Ethernet for Stability: While Raspberry Pi supports Wi-Fi, using an Ethernet connection will provide better stability, especially for a server.
- Back Up Regularly: Even though FreedomBox is designed for privacy and security, regular backups of your data ensure you don't lose anything important.
Choose Services and Remote Access Deliberately
The strongest starting point is one concrete need: a wiki, a file-sharing service or remote access to the home network. A small board running many services can encounter memory, storage or upload-bandwidth limits. Check the app's requirements and available disk space before treating the catalogue as a list to install in full.
Email deserves particular care. FreedomBox's mail service uses Postfix, Dovecot and Rspamd, but Internet mail needs a suitable domain, DNS records and connectivity. An ISP blocking outbound port 25 can prevent delivery. A functioning local mailbox is therefore different from a dependable public mail service; do not move essential correspondence until you have verified sending, receiving and recovery.
Decide whether each app should be local-only, accessible through your VPN or public. For public access, follow the service's documented domain, firewall and certificate requirements. A dynamic DNS name tracks an address; it does not remove CGNAT or create permission to access an app. Expose only what the chosen service needs.
Backups and Recovery
FreedomBox's backup feature uses Borg and can store selected app data locally or in a remote SSH repository, with encryption options. Check the app-specific coverage: shared-folder contents used by Samba or Syncthing and downloaded torrent files are among the documented exclusions. A successful settings backup is not proof that your personal files are included.
Keep a second copy off the Pi, record encryption passphrases safely and try a restore before relying on the server. System snapshots and a backup saved on the same microSD card do not cover a lost or failed card. A USB drive can be an alternative boot/storage choice where the hardware instructions support it, but moving to USB still requires backup and a correctly configured boot path.
Why Run FreedomBox on a Raspberry Pi?
- Cost-Effective Privacy: With a Raspberry Pi and FreedomBox, you can set up your own server for a fraction of the cost of cloud subscriptions or expensive server hardware. Board prices vary by model, memory and region. Compare the complete kit and running costs with existing hardware; a dated launch price is not a current quotation.
- Low Power Consumption: Running a server 24/7 can be expensive, but a Raspberry Pi uses very little electricity, making it an energy-efficient choice.
- Control and Autonomy: By using FreedomBox on a Raspberry Pi, you retain full control over your data and services, without relying on third-party companies.
- Learn and Experiment: Setting up a Raspberry Pi with FreedomBox is a great way to learn about servers, privacy tools, and networking, even if you're not tech-savvy.
- Secure and Private: FreedomBox’s focus on privacy means you can enjoy secure file sharing, communications, and web hosting, with encryption and anonymization tools built-in.
Conclusion
FreedomBox on a Raspberry Pi gives users a powerful, affordable, and private way to manage their own server and online services. With its wide array of apps and privacy-centric tools, FreedomBox offers the kind of control over data and services that many people crave in today’s tech-dominated world. Whether you’re looking to host your own cloud storage, run a VPN, or create a secure messaging platform, FreedomBox on a Raspberry Pi provides a user-friendly path to privacy and independence.
By taking this small step toward personal autonomy, you're also helping to support a broader vision for an open and decentralized internet.
For more information, or to buy a ready made FreedomBox box set, head on over to the Freedombox official website.