A Raspberry Pi camera turns a small computer into a tool for photography, monitoring and computer vision. The real magic comes from combining pictures with a program: recording a plant as it grows, watching a print in progress, or helping a robot recognise its surroundings. You do not need to buy the most expensive sensor to begin. Choose the camera, lens and software around what you want to see.
This guide covers the differences between official camera modules, third-party CSI cameras and USB webcams, followed by a practical connection and capture sequence. Image quality depends on lighting, focus, exposure and mounting as well as megapixels. A high-resolution camera aimed through a dirty window will still produce a disappointing picture.
Choose the camera around the job
Official CSI modules connect through a ribbon cable to a compatible Raspberry Pi camera connector. They are compact and well integrated with the supported Raspberry Pi camera software. A USB webcam connects through USB and uses a different capture interface. The two are useful alternatives, but a working command for a CSI module is not automatically a working command for a webcam.
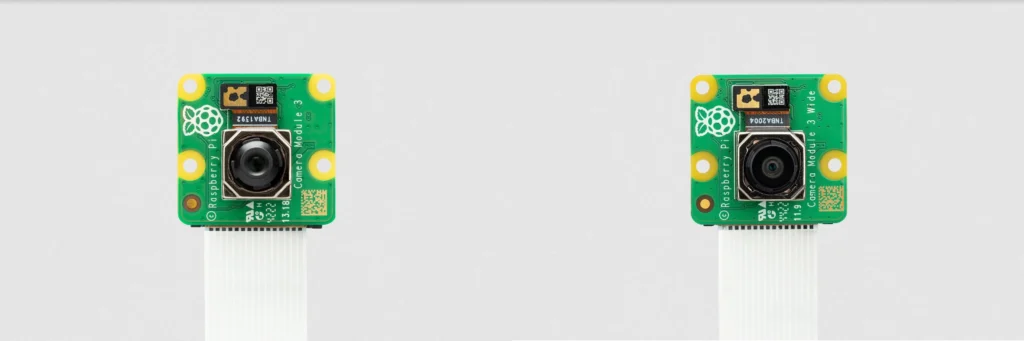
- Camera Module 3: A good general-purpose starting point, with an approximately 12-megapixel Sony IMX708 sensor, motorised autofocus and an HDR mode of up to 3 megapixels. Standard and Wide variants have 75° and 120° diagonal fields of view respectively. The Wide model fits more of a room into a frame; the standard model gives a narrower view. Normal and NoIR versions are available.
- Camera Module 2: The older 8-megapixel IMX219 option remains useful for projects that do not need motorised autofocus. Check the particular module and its focus requirements rather than assuming it has Module 3's autofocus controls.
- High Quality Camera: This approximately 12.3-megapixel IMX477 camera is available with C/CS or M12 lens mounts. Budget for a compatible lens and mount. Interchangeable optics are useful when subject distance or framing matters more than having the smallest board.
- Global Shutter Camera: The official approximately 1.6-megapixel IMX296 model suits fast motion and machine vision. Its global exposure avoids the skew associated with reading a rolling-shutter sensor row by row. It still needs suitable lighting and a short exposure to avoid ordinary motion blur.
For a beginner taking still pictures or making a simple time lapse, I would start with a general-purpose module before spending more on specialist optics. Robotics or fast-moving machinery may justify a global shutter; a fixed view of a shelf usually does not. Consider where the camera can be mounted and whether the ribbon cable will reach before ordering.
Third-party cameras and USB webcams
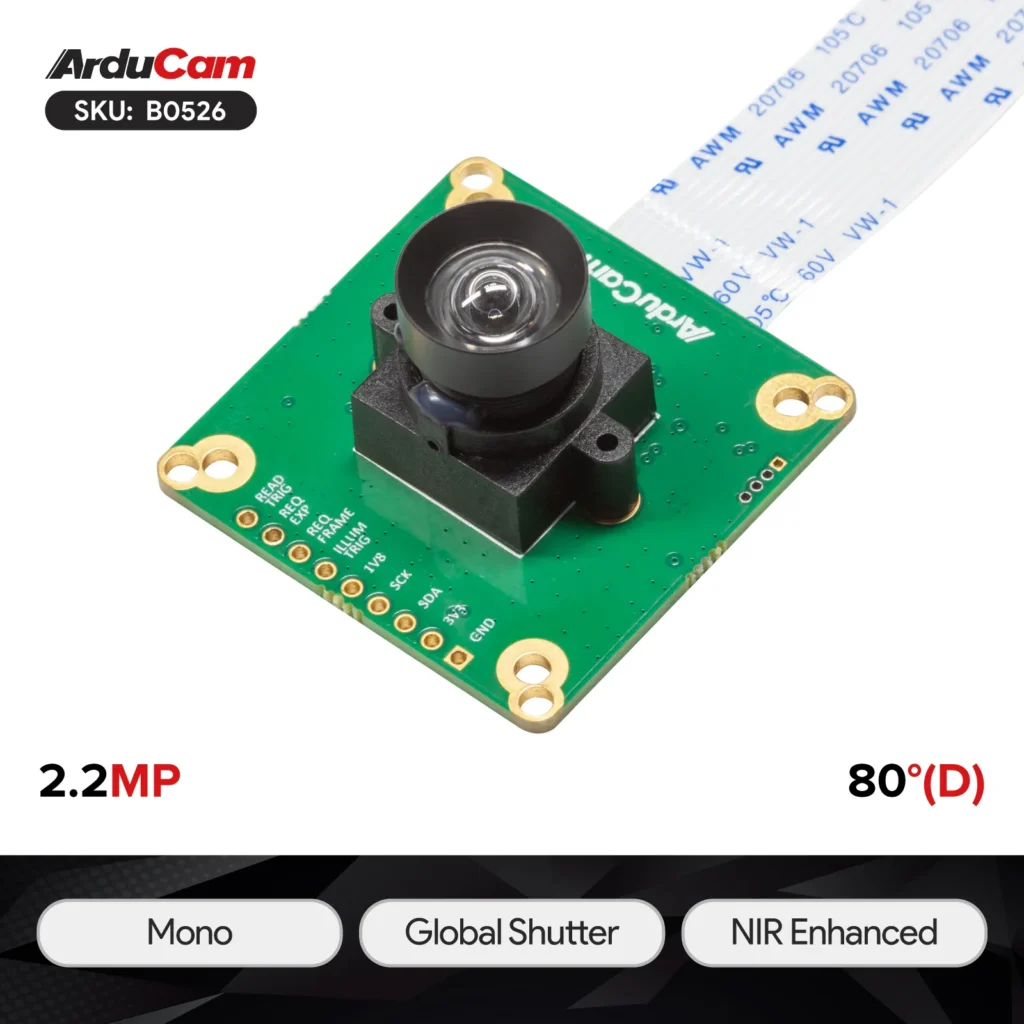
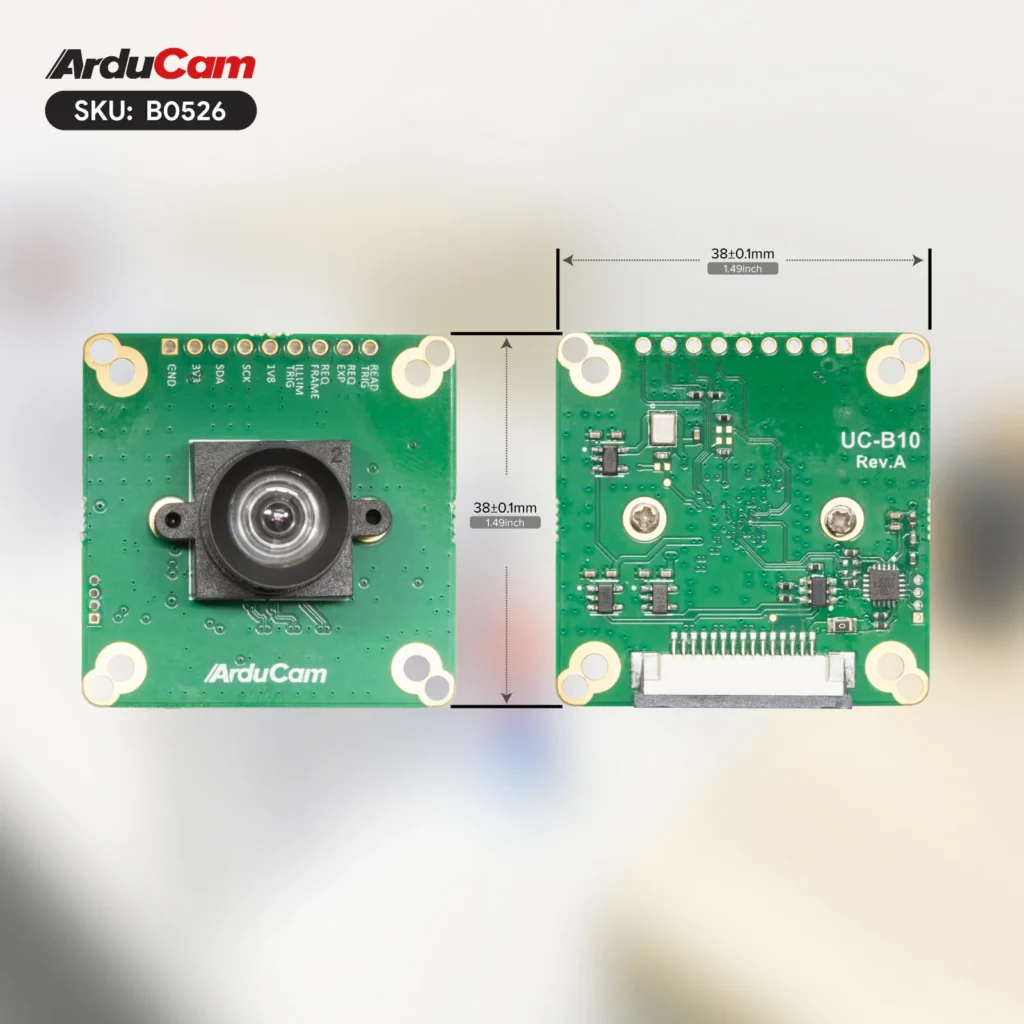
Arducam offers additional sensors, lens choices and autofocus models, including 16-megapixel options. Read the exact model's documentation rather than treating every Arducam board as interchangeable. The Mira220 camera illustrated below is specifically the B0526 PiVariety 2.2-megapixel monochrome global shutter model, with a manually focused M12 lens. It is not the 16-megapixel autofocus example.
Arducam's Mira220 instructions include a device-tree overlay and its own libcamera/application installation procedure. Support depends on the board, kernel and operating-system release. Those instructions cover particular combinations; do not infer that a new OS release or an arbitrary standard camera package will work unchanged. Keep a record of the model and working software versions before upgrading.
A USB webcam, such as a compatible Logitech model or another UVC device, can be convenient when you already own one or need a longer cable run. Confirm Linux support and the available resolution, frame rate and capture format for that exact device. USB bandwidth, compression and software encoding can affect the complete system. It will not normally appear as an official CSI camera in the commands below.
Browse the Raspberry Pi Camera Module documentation and the ArduCam Website for model-specific information. Include cables, lenses and any necessary driver work in your comparison, not just the price of the sensor board.
NoIR, lighting and focus
A NoIR module lacks the usual infrared-cut filter, so it can see both visible light and infrared. It does not generate illumination or turn complete darkness into a usable picture by itself. Night monitoring generally needs an appropriate external infrared light source. Check the camera and illuminator specifications, coverage and mounting position; reflections from a nearby window or enclosure can obscure the subject.
NoIR daytime colours can differ from those of a camera with an infrared-cut filter. It is also not a thermal camera: sensitivity to reflected infrared is different from measuring an object's heat. If accurate daytime colour matters, a normal camera may be the better choice. Do not assume that a basic NoIR board automatically switches a mechanical filter between day and night.
For any camera, make a test image at the actual subject distance. Check focus at the centre and edges, exposure on bright objects and detail in shadows. Autofocus is helpful for changing distances; a carefully set manual lens can be useful for a permanently mounted view. Stable mounting and enough light often make a bigger practical difference than raising resolution.
Connect the camera and take a picture
Follow these steps for a supported official CSI camera on a current Raspberry Pi OS installation. Third-party modules may need their vendor's additional setup. The physical connector, cable orientation and camera port must match the particular Pi board.
- Shut down and disconnect power. Fit the ribbon cable with the connector latch open, following the board's illustrated instructions, then secure the latch. Do not connect or remove the camera while the Pi is powered.
- Choose the correct cable. Official camera boards use the standard 15-pin camera connector. Raspberry Pi 5 and Zero boards use a smaller 22-pin connector at the computer end, requiring the appropriate standard-to-mini cable. Earlier flagship boards such as Pi 4 use the standard connector. Check the exact board or Compute Module carrier, rather than assuming every Pi has the same socket.
- Boot the supported OS and identify the camera. From Raspberry Pi OS Bookworm onward, the camera applications use the
rpicam-names. Supported official modules are normally detected without enabling the old legacy camera menu.
rpicam-hello --list-cameras
rpicam-hello -t 5000
rpicam-still --output image.jpg
The first command lists detected cameras; the second shows a five-second preview; the third saves a JPEG in your current directory. Use a new filename for another picture if you want to keep the previous one. A preview needs a suitable display environment; check the application's preview options when working remotely or without a desktop.
Older tutorials use raspistill, raspivid or the original Python Picamera library. These belong to the unsupported legacy camera stack. For new Python work, use Picamera2 and its documented supported OS packages, preferably the recommended apt installation. Avoid mixing old instructions with the modern stack. See the official camera software guide and Picamera2 documentation.
Useful projects to build next
- Time-lapse photography: Choose an interval that matches the process, use separate numbered or dated filenames and estimate storage before leaving it running. A stable view and consistent exposure help prevent distracting flicker between frames.
- Pet, wildlife or print monitoring: Start with a live view, then add recording or notifications. Check lighting at the times you will actually use it. Motion detection can react to changing shadows, so tune it to the scene rather than assuming every alert represents an animal or a print failure.
- Robotics and computer vision: Begin with a repeatable task, such as detecting a coloured object, before adding more complex recognition. Resolution and processing rate should suit the model and Pi. A global shutter can reduce geometric distortion but does not guarantee accurate recognition.
- Photography and interactive projects: A photo booth, document capture station or scientific observation setup combines framing, a trigger and sensible file handling. Decide how people start a capture and where the pictures are saved.
A further option is the Raspberry Pi AI Camera, which uses the IMX500's on-camera inference capabilities. It needs compatible model firmware and software to interpret the results. It does not make every machine-learning model run automatically, and an ordinary camera can still support computer vision with processing elsewhere in the system.
Streaming and home monitoring
Capturing a picture and publishing a network stream are separate jobs. A raw H.264 stream sent over TCP is not an RTSP server. The receiver must understand the transport and format; a filename or port number alone does not change the protocol.
MediaMTX documents a native Raspberry Pi camera source for supported Bookworm and Trixie installations, plus a separate FFmpeg-based path for generic webcams. Its camera instructions explicitly warn that prebuilt binaries using standard libcamera are incompatible with custom libcamera builds such as some Arducam installations; those require an appropriate source build or a compatible publishing arrangement. Follow the Raspberry Pi camera instructions or webcam instructions for your actual hardware.
Configure access controls, recording retention and the intended local viewing devices before using a camera for household monitoring. Evaluate the whole path from camera to player under normal network load. Neither a global shutter nor an RTSP configuration promises a particular end-to-end latency.
Troubleshooting and a sensible first purchase
If no camera is detected, check the exact cable and port, then power down before reseating connections. For a third-party sensor, verify its overlay and software requirements. If detection works but capture fails, close other programs using the camera and check the error message before reinstalling everything.
For an unclear picture, separate focus, motion blur and insufficient light: a static scene that is sharp while moving subjects smear calls for different changes from a scene that is out of focus everywhere. Remove a protective lens film if fitted, keep the lens clean and avoid pointing through a reflective cover. Provide adequate power, cooling and storage for the complete Pi installation.
Raspberry Pi cameras are powerful and versatile project tools. Start with one reliable capture, then add the time lapse, recording or recognition features you need. That makes each upgrade easier to assess and leaves you with a setup you understand instead of a collection of settings copied from unrelated hardware.