Have you ever wished for an easy way to access all your favorite tools and applications in your home lab? Enter Homepage—a simple, customizable dashboard that brings everything together on one screen. Whether you’re a tech enthusiast or just curious about setting up your own home lab, this guide explains what Homepage is, how it works and the configuration involved in running it.
What is Homepage?
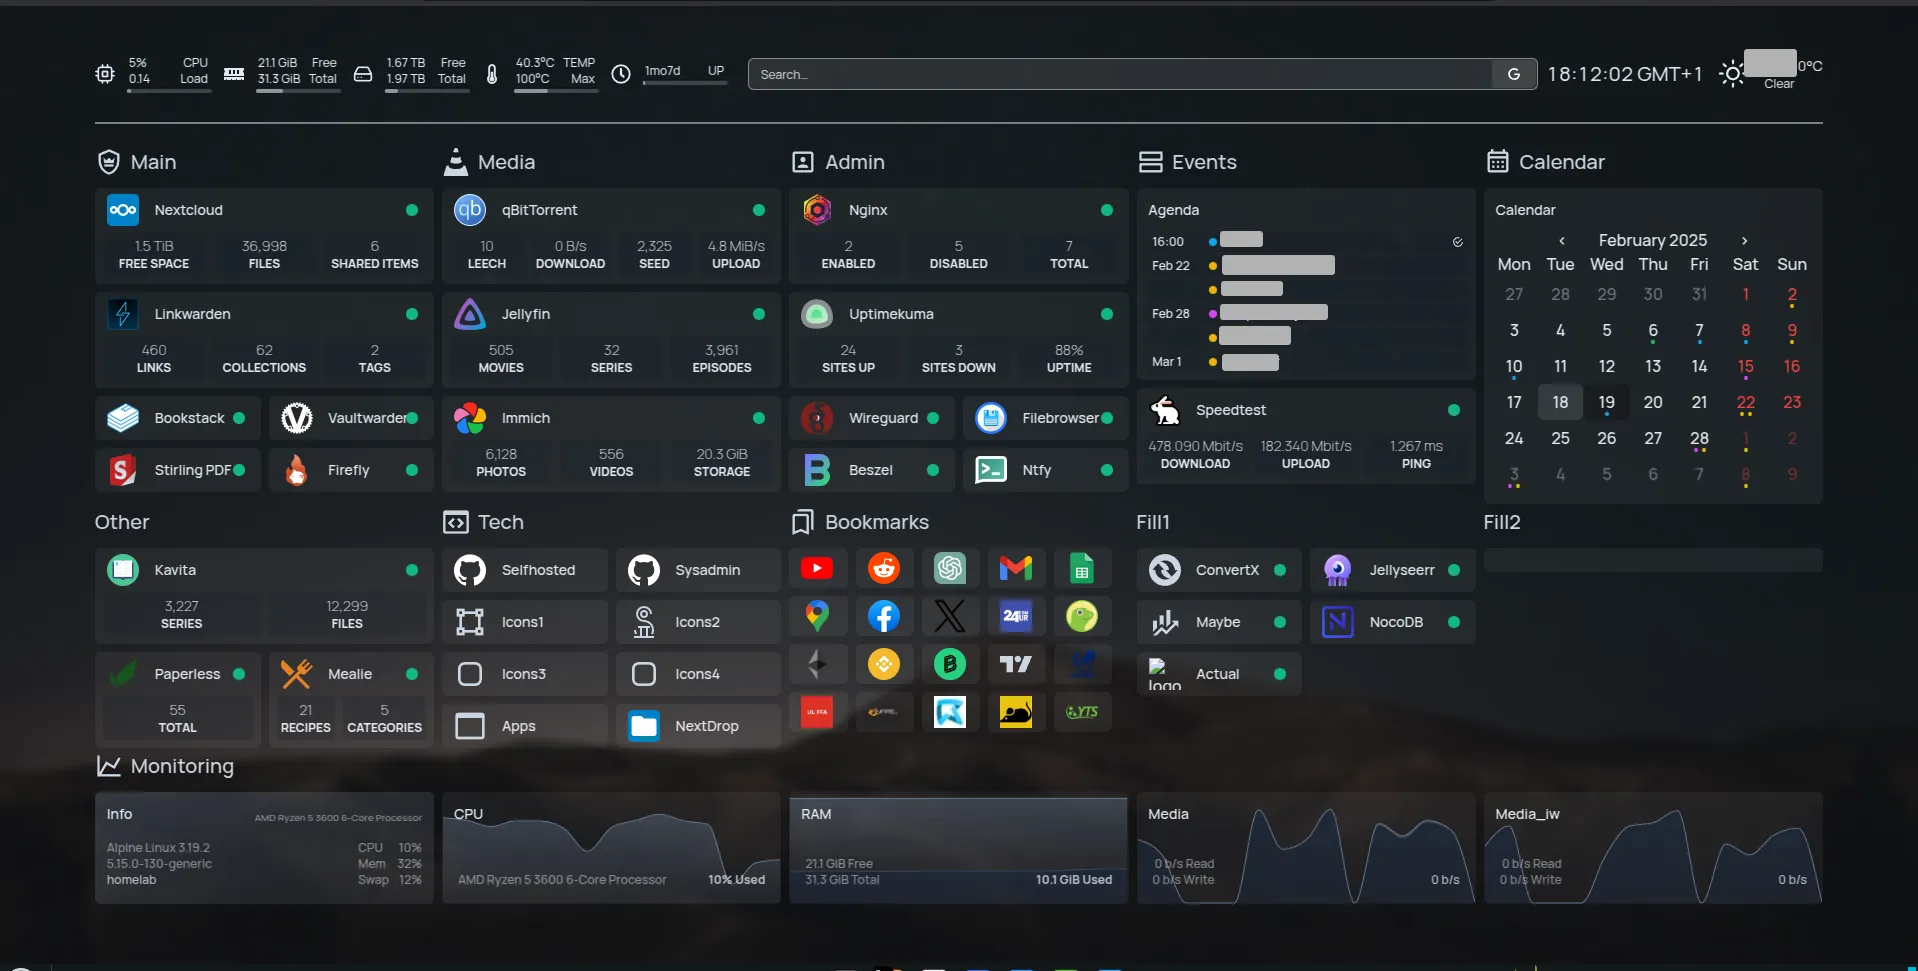
Homepage is an open-source dashboard that acts as a central hub for your home lab services. Imagine having all your self-hosted apps, websites, and tools in one place—Homepage makes that possible by letting you create a personalized homepage that links directly to each service you use. Instead of remembering a dozen different URLs or navigating through multiple menus, Homepage puts everything at your fingertips.
How Does Homepage Fit into a Home Lab?
A home lab is your personal playground for testing, learning, and running various applications at home. Homepage fits right into this environment by:
- Centralizing Access: It offers a single point of entry to all your home lab projects.
- Streamlining Navigation: With a clean, customizable interface, you can quickly find and open the apps you use most.
- Enhancing Organization: It helps you keep track of different services, making your home lab less cluttered and more user-friendly.
What Homepage Does and How It Works
At its core, Homepage is all about simplicity and accessibility. Here’s a closer look:
- Custom Dashboard: Homepage lets you create a dashboard that displays tiles or cards for each of your services. Each card can include a title, an icon, and a link.
- Easy Customization: With a straightforward configuration file, you can decide which services appear on your dashboard, how they’re organized, and even tweak the design to suit your style.
- Lightweight and Fast: Built with efficiency in mind, Homepage is designed to load quickly even on modest home lab setups.
Examples of What Homepage Can Do
To illustrate its versatility, here are a few practical examples:
- Quick Access to Media Servers: Link your Plex, Jellyfin, or other media servers so you can stream your favorite movies and shows with just one click.
- Home Automation Dashboards: Link to a control panel such as Home Assistant and configure supported widgets for a quick overview. Homepage is not a replacement for the underlying application's controls or permissions.
- Personal Projects: Whether it’s a blog, a personal website, or a file server, Homepage can host links to all your creative endeavors.
- Status Monitoring: Add links to monitoring tools or logs so you can keep an eye on your home lab’s performance.
These examples show that Homepage isn’t just about linking apps—it’s about creating a tailored experience that makes your digital life at home more connected and efficient.
What Makes Homepage Great
Homepage stands out for several reasons:
- Simplicity: It’s designed for users of all technical levels, meaning even beginners can set it up without any programming experience.
- Flexibility: The open-source nature allows you to tweak and customize your dashboard as your needs evolve.
- Community-Driven: With an active community, you can find support, tips, and creative ideas to enhance your setup.
- Low Resource Usage: Start with a small set of links and measure your own deployment. Widget polling, the number of integrations and other services on the host affect resource use.
Considerations When Using Homepage
Before diving in, here are some important points to keep in mind:
- Security: Since Homepage links to your internal services, restrict access to trusted users and networks. Widgets can reveal personal information even if their API credentials are not sent directly to the browser.
- Regular Updates: Like any software, review release notes, back up configuration and test updates before replacing a working deployment.
- Customization Needs: While Homepage is highly customizable, it does require editing a configuration file. Take your time to understand its structure and make gradual changes.
- Backup Your Settings: As you tailor your dashboard, keep a backup of your configuration. This makes it easier to restore your setup if something goes wrong.
Step-by-Step Installation Guide for Non-Technical Users
This local Docker Compose example is intended for a first evaluation on a machine that already has Docker and Compose installed. Use Homepage’s website for the current installation documentation. If Docker is missing, follow the instructions for your operating system on the Docker website.
Create a dedicated project directory with a config subdirectory, then save this as compose.yaml. Keep the configuration directory writable by the container's configured user. This example uses the image's default user and deliberately omits Docker socket access.
services:
  homepage:
    image: ghcr.io/gethomepage/homepage:latest
    restart: unless-stopped
    ports:
      - "127.0.0.1:3000:3000"
    volumes:
      - ./config:/app/config
    environment:
      HOMEPAGE_ALLOWED_HOSTS: localhost:3000,127.0.0.1:3000
docker compose up -dOpen http://localhost:3000 in a browser on the Docker host. Homepage's documented container port is 3000, and its published image is in the GitHub Container Registry. The mounted /app/config directory retains your settings when the container is recreated.
The loopback binding limits this example to the host; another computer's localhost is not the server. For LAN or proxy access, plan the publishing address, authentication and exact allowed Host values, including ports where needed. HOMEPAGE_ALLOWED_HOSTS is host-header validation, not a password or a firewall. Avoid a wildcard simply to suppress an error.
Start with links before adding integrations, and check the logs if the page rejects a host or cannot read its configuration. The project supports non-root operation through PUID and PGID; choose values matching your own filesystem permissions rather than copying an arbitrary user ID. Consult Homepage’s website for version-specific help.
Conclusion
Homepage is an accessible and flexible way to bring your homelab services into one dashboard. Its simplicity and customization make it appealing for people who want a more organized setup. Allow time to learn its YAML structure, secure the access route and verify widgets individually. That makes the dashboard useful without assuming a link or status indicator guarantees that the underlying service is healthy.
Configure Links First, Then Widgets
The mounted configuration directory contains files such as services.yaml, bookmarks.yaml, settings.yaml and widgets.yaml. Service definitions organize application cards; information widgets provide dashboard-wide items such as resources, search or time. A service's API widget is nested under that service definition rather than placed indiscriminately in the information-widget file.
A small config/services.yaml example is easier to understand before introducing secrets:
- Infrastructure:
    - Proxmox:
        href: https://192.168.1.10:8006
        description: Virtualization host
    - Pi-hole:
        href: http://192.168.1.2/admin
        description: DNS administration
Replace these example addresses with your actual services. YAML indentation is significant; use spaces consistently. Save and refresh the dashboard, and follow the relevant documentation when a setting requires a restart. Do not assume every kind of configuration change applies instantly.
The href address is opened by the browser. A widget's url is accessed by Homepage from its server or container. Those two environments can have different DNS, firewall and network access. A link working on your laptop does not establish that the container can query the service API.
Proxmox and Pi-hole API Permissions
For a Proxmox widget, the project's guide uses a dedicated API user and token with the PVEAuditor role, including the necessary propagated permissions for the user and privilege-separated token. Use that read-oriented account for the widget; it does not need an administrator's root token. The widget username takes the token identity, such as api@pam!homepage, and the password setting takes the token secret, not the user's interactive password.
Homepage documents secret substitution through variables beginning HOMEPAGE_VAR_ or file references beginning HOMEPAGE_FILE_. An expression such as {{HOMEPAGE_VAR_PROXMOX_SECRET}} works only when that variable is actually passed into the container. Storing it in an unrelated host environment is insufficient. Keep these values out of public configuration repositories and redact them from support logs.
Pi-hole v6 requires version: 6 in its widget configuration. Its key can use the appropriate password or application password; a v5 API token is not interchangeable with the v6 authentication method. Match the widget documentation to the installed target version before concluding that a network problem caused an authentication error.
Automatic Discovery Has Its Own Access Requirements
Docker integration is optional and configured in docker.yaml. Once a Docker instance is connected, homepage.* labels can add service cards automatically. A label alone does not establish API access, and live application widgets still need their own valid configuration and credentials. Container statistics and application statistics are separate integrations.
The documentation recommends considering a restricted Docker socket proxy because direct access to the Docker API is sensitive. A socket mounted with :ro does not itself turn the Docker API into an authorization-limited read-only service. Protect the proxy's reachable network and permitted operations; do not expose an unauthenticated Docker API on the LAN or internet for convenience.
Security, Maintenance and Useful Status Checks
Current Homepage v2 documentation includes an optional password or OIDC authentication gate. Enabling it requires the documented authentication variables, a unique signing secret and the correct external URL. It is not enabled merely by setting allowed hosts, and older releases do not necessarily provide it. The documentation still recommends a secure reverse proxy or VPN for public access, and notes that password attempts need appropriate rate limiting outside a trusted network.
Server-side API proxying reduces direct credential exposure, but authorized dashboard viewers can still see the information returned by a widget. Decide who should see infrastructure details, calendars or home-automation data. Securing Homepage also does not automatically secure each application's own URL.
A site monitor checks an HTTP response; it does not automatically sign into an application behind authentication. An API widget failing can mean an invalid token or an unreachable container route even while the application is healthy. Test the link, the server-side API path and the target service separately before relying on a green or red indicator.
Back up configuration, locally supplied assets and the secure source of any secrets. Test a recreation with retained configuration and confirm that links, widgets and access controls behave as intended. These are more useful comparison points for a dashboard than unsupported fixed RAM estimates or a claim that any product keeps credentials completely hidden under every configuration.