The Raspberry Pi is a series of small, affordable single-board computers developed by Raspberry Pi Ltd. Designed to promote computer science education and hobbyist projects, these versatile devices can be used for a wide range of applications, from simple programming tasks to complex electronics projects. A Raspberry Pi typically runs the Linux-based Raspberry Pi OS, and supports various programming languages, making it a favorite among educators, students, and tech enthusiasts.
How Does a Raspberry Pi Work?
A Raspberry Pi functions like a standard computer but in a compact form factor. It includes essential components such as a processor, memory, and input/output ports. Users can connect peripherals like keyboards, mice, and monitors to interact with the device. The Raspberry Pi’s GPIO (General Purpose Input/Output) pins allow it to interface with other hardware components, enabling users to build and control electronic projects.
From the AI Kit to the Standalone Raspberry Pi AI Camera
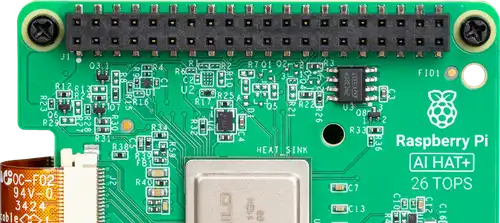
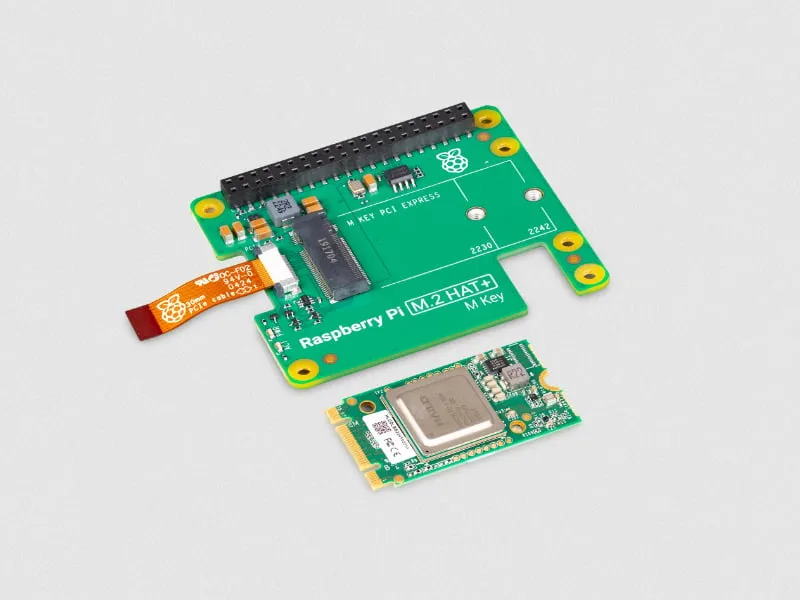
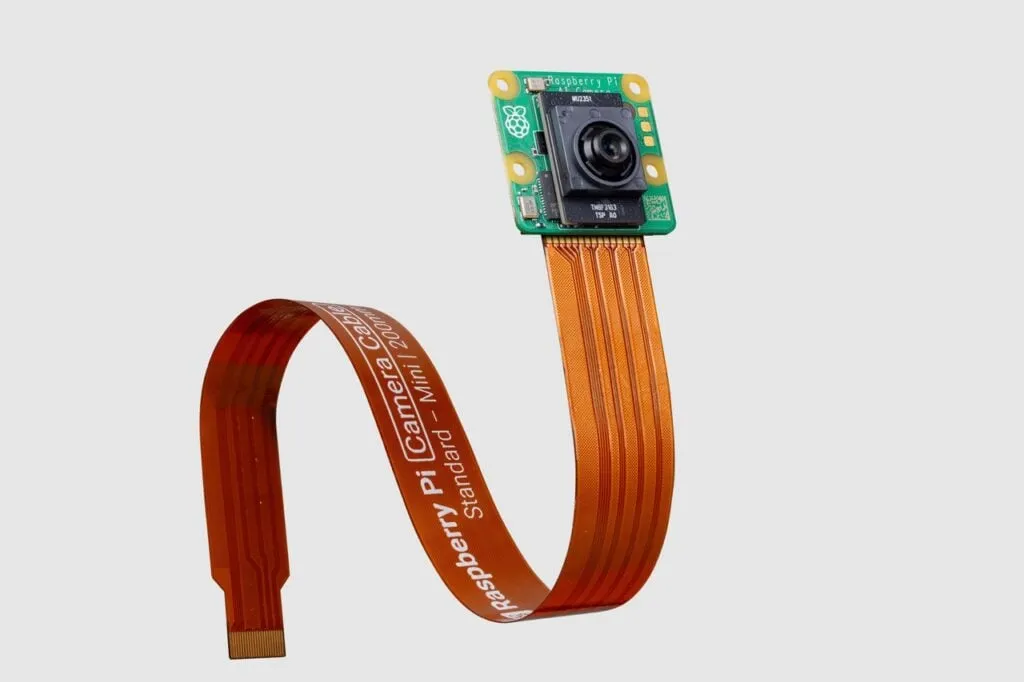
In June 2024, Raspberry Pi first introduced the Raspberry Pi AI Kit (an M.2 HAT+ paired with a Hailo-8L PCIe accelerator for the Raspberry Pi 5). The standalone Raspberry Pi AI Camera, developed with Sony Semiconductor Solutions, launched on 30 September 2024. Rather than requiring a PCIe HAT, the AI Camera integrates a 12.3-megapixel Sony IMX500 Intelligent Vision Sensor with its own built-in neural network accelerator directly on the camera module—enabling real-time object detection and pose estimation on compatible Raspberry Pi computers using the appropriate camera connector, ribbon cable and software.
Specifications of the Raspberry Pi AI Camera
The Raspberry Pi AI Camera combines impressive image-capture specifications with a separate, constrained inference workload:
- Sensor: Sony IMX500 Intelligent Vision Sensor
- Resolution: 12.3 megapixels (4056 × 3040 pixels)
- Framerate: 30 fps at 2028 × 1520 resolution, 10 fps at full resolution
- Field of View: Horizontal 66.3° ±3°, Vertical 52.3° ±3°
- Focus Range: 20 cm to ∞, with manually adjustable focus
- Physical Dimensions: 25 × 24 × 11.9 mm
- Operating Temperature: 0 °C to 50 °C
Applications and Use Cases
The AI Camera opens up numerous possibilities for vision-based AI applications, including:
- Robotics: Enhance robot vision for navigation and object manipulation.
- Automation: Implement smart surveillance systems with real-time object detection.
- Object Counting: Explore counting a defined class of objects in a controlled scene, then measure missed and duplicate detections.
- Education: Provide hands-on learning experiences in AI and computer vision.
Using the Raspberry Pi AI Camera
Start with a Raspberry Pi that has a camera connector and a supported Raspberry Pi OS installation with current camera packages. The official examples assume a Pi 4 Model B or Pi 5; other connector-equipped models, including Zero 2 W and Pi 3 Model B+, may need adjustments. Follow the camera-specific guide rather than a Hailo installation guide.
Shut down and disconnect power before attaching the ribbon. Use the correct Standard-Standard cable for a Pi 4 or Standard-Mini cable for a Pi 5 or Zero-family camera connector, and check connector orientation in the official installation instructions. Seat the cable straight, close the retaining flap and avoid sharp bends. Power the board on after the connection is secure.
Then follow these software steps, reviewing package changes before accepting the prompts:
- Update Raspberry Pi OS: Update the installed Raspberry Pi OS packages:
sudo apt update && sudo apt full-upgrade - Install the IMX500 Firmware & Models: Download the Sony IMX500 neural network firmware, pre-packaged MobileNet/PoseNet models, and
rpicam-appspost-processing stages:sudo apt install imx500-all - Reboot Your Raspberry Pi: Restart your device after the package updates:
sudo reboot - Run Example Applications: Utilize pre-installed demos like MobileNet SSD for object detection or PoseNet for pose estimation.
Raspberry Pi AI Camera (IMX500) vs. Raspberry Pi AI Kit (Hailo-8L)
A common question among makers is how the Raspberry Pi AI Camera differs from the Raspberry Pi AI Kit and AI HAT+. They accelerate computer vision through different hardware architectures. The AI Kit is now out of production; its column is a reference for existing owners, while the AI HAT+ remains a separate product. The newer AI HAT+ 2 has a different accelerator and software package, so confirm the exact variant when buying or following instructions. Compare local availability and prices separately from technical suitability:
| Feature | Raspberry Pi AI Camera (Sony IMX500) | Raspberry Pi AI Kit (Hailo-8L) | Raspberry Pi AI HAT+ (Hailo-8L / Hailo-8) |
|---|---|---|---|
| Where the AI Runs | In the Sony IMX500 image sensor’s integrated accelerator | On a PCIe M.2 2242 card mounted on the M.2 HAT+ | On the HAT+ board’s built-in Hailo NPU |
| Connection Interface | MIPI CSI-2 camera connection; choose the Standard-Standard or Standard-Mini cable for the host connector | PCIe FPC connector (Raspberry Pi 5 only) | PCIe FPC connector (Raspberry Pi 5 only) |
| Raspberry Pi Compatibility | Compatible Raspberry Pi computers; check the camera connector, correct cable and supported OS | Raspberry Pi 5 only | Raspberry Pi 5 only |
| Model Deployment | IMX500-compatible packaged network with matching host post-processing | Hailo-compatible compiled model and runtime | Hailo-compatible compiled model and runtime |
| PCIe Slot Availability | Does not use the Pi 5 PCIe connection; check physical mounting and power when adding other hardware | Occupies the Pi 5 PCIe lane | Occupies the Pi 5 PCIe lane |
How On-Sensor Neural Processing Works on the Sony IMX500
The IMX500 combines image capture with neural network inference in the sensor. The camera sends image data and inference tensor metadata to the host. That reduces the need for the Pi CPU to execute the neural network, but does not remove host work: the application still handles camera control, post-processing, drawing, recording and any downstream automation.
The output format depends on the model. Tensor values need model-specific interpretation before they become useful bounding boxes or pose points. Installing a different network without the corresponding post-processing can produce plausible-looking but incorrect results. The published sensor memory budget covers firmware, network weights and working memory together. Check the conversion and packaging results rather than assuming any model will fit.
Firmware and a network load when the camera starts; a first uncached load can take several minutes. Watch the console progress before assuming a quiet preview means failure. The onboard RP2040 manages transfers and caches recently used files in flash. That cache is distinct from the IMX500’s limited inference memory, so it does not mean a larger network will fit.
Run the Official Detection and Pose Examples
First run the object-detection example:
rpicam-hello -t 0s --post-process-file /usr/share/rpi-camera-assets/imx500_mobilenet_ssd.json --viewfinder-width 1920 --viewfinder-height 1080 --framerate 30Stop it with Ctrl+C before starting the pose-estimation example:
rpicam-hello -t 0s --post-process-file /usr/share/rpi-camera-assets/imx500_posenet.json --viewfinder-width 1920 --viewfinder-height 1080 --framerate 30These examples run until stopped and expect a usable preview display. Over a headless connection, --nopreview suppresses the window; it also removes the visual overlay used for this check. Use the current camera documentation if an asset name differs in your installed package. A working preview establishes a baseline before adding recording, networking or application logic.
If no camera is detected, use the documented diagnostic below, then check package installation and the correct connector/cable with the board powered off. If capture works but overlays fail, check the model and post-processing files separately rather than immediately replacing the camera:
rpicam-hello --list-camerasCamera detection confirms the connection and driver path; it does not validate a neural network.
Evaluate the Camera in Your Real Scene
Begin with one task, such as detecting people at a doorway, rather than expecting a demonstration model to understand every object. Mount the camera at its intended height, adjust the manual focus and test under the lighting that will actually occur. A bright desktop demonstration tells you little about backlighting at a door or motion blur in a dim room.
The sensor's full image resolution and the neural network's input size are different things. Cropping or resizing can make a small object occupy too few model pixels even when it looks clear in the preview. Check the region of interest and overlay alignment. Try an object near the center and near each edge before using coordinates to control a robot or trigger an alert.
Keep a simple evaluation log: how many relevant events occurred, how many were detected and how many alerts were false. Repeat with empty scenes, partial occlusion and multiple objects. Adjust a confidence threshold against those observations. Raising it can reduce false alerts while missing more genuine events; lowering it can reverse that tradeoff. A confidence score is not a guarantee that a classification is correct.
Turn Detections into Useful Events
A single frame should rarely trigger an expensive action. For a homelab notification, require a detection to persist across several observations, define a cooldown and record why the event was emitted. Decide what happens when the camera disconnects or inference stops: no detection and no working sensor are different states. Test those failure cases deliberately during development.
For an object counter, distinguish frame detections from individual objects passing through a boundary. A stationary object can appear in hundreds of frames without representing hundreds of arrivals. Tracking and counting logic belong in the application. Measure end-to-end event delay and host CPU use on your own board, especially while recording video; sensor inference speed alone is not an application benchmark.
Custom Models and Data Handling
Start custom development with the documented Sony conversion and IMX500 packaging workflow. A general ONNX or TensorFlow model is not automatically a drop-in camera file: supported operations, quantization, input layout and output post-processing matter. Retain a known-working example so you can isolate model problems from camera or OS problems.
Where the task only needs counts or state changes, consider storing those events instead of continuous identifiable footage. Define retention and access for any images you do keep. Local inference gives you choices about where data goes, but the application can still upload it if configured to do so. Make that decision explicitly before placing a camera in a shared space.
Conclusion
For AI enthusiasts and developers, the AI Camera is a game-changer in a compact form, opening up appealing experiments in intelligent vision. Its practical value comes from matching that capability to a supported model and a well-defined task. Start with the official examples, then evaluate the actual scene, model and application together. Choose a Hailo accelerator when its supported models and deployment route suit the project better. Hardware specifications describe capabilities; a measured acceptance test shows whether your particular use case works.
For the original announcement and architecture explanation, visit the official launch blog for the Raspberry Pi AI Camera.