If you are following along with our Build your own Homelab series, you will have quite a few containers and/or VMs up and running in your Proxmox machine. Many of them will have been created with the default resource settings so that we can get up and running as quickly and easily as possible. Yes, it is possible to change resources in terms of CPU Cores and Memory as well as disk space, so let's dive in and take you through the process of changing these for both LXC containers as well as Virtual Machines.
Before Changing a Guest's Resources
The retained screenshots demonstrate the original Proxmox interface; the VM hardware screenshot identifies Proxmox VE 8.3.5. Later releases can change menu labels. Keep the procedure's distinction between an LXC Resources page and a VM Hardware page, and select the intended guest before editing anything.
Make a recoverable backup and record the current guest ID, memory, CPU and disk configuration. Check the host's spare RAM and the selected storage's available capacity. A larger guest limit does not create physical resources, and a thin-provisioned volume can outgrow the space actually available to it. Choose a maintenance window for an important service and define how you will verify its application afterward.
Use a measured reason for the change. A full guest filesystem calls for inspecting space usage, while a slow service may be waiting on storage or network rather than CPU. Increase one resource at a time when practical so you can tell which change helped. Keep room for the Proxmox host and other guests instead of assigning every spare resource to one workload.
Changing Allocated Resources for an LXC Container
First the easier one. An LXC container shares the host Linux kernel while keeping its own userspace. Proxmox controls its resource limits through the host, which differs from a VM with an emulated hardware configuration. In the left navigation pane, expand Datacenter and then expand your Proxmox node hosting the LXC Container whose resources we want to adjust. In the middle navigation pane, select Resources to bring up the resource view of the LXC Container
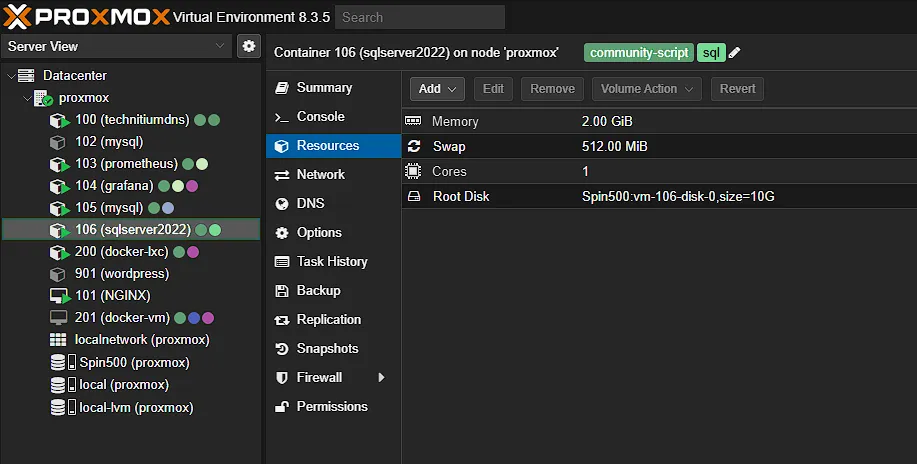
The main settings shown here are:
Memory - The configured RAM limit
Swap - The permitted additional use of host swap, where available
Cores - The configured CPU core limit
Root Disk - The selected root volume and its configured capacity.
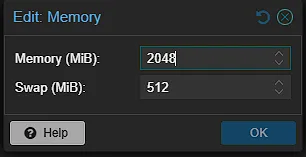
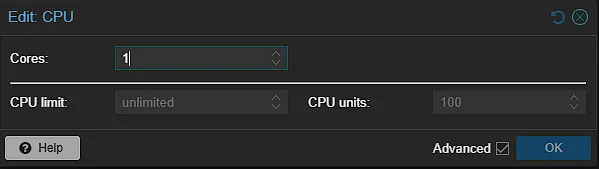
The first three, memory, swap and cores are straightforward. Select the setting you want to change and then click the Edit button on top to edit the values:
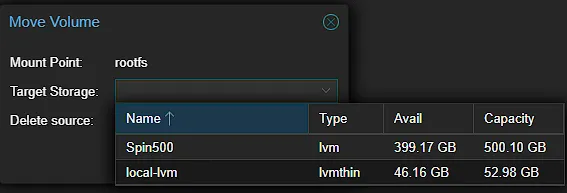
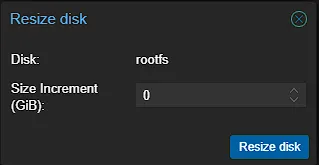
As for the disk space, it becomes a bit more interesting seeing as we cannot decrease disk space. We can increase, but that is all we are allowed to do with disk space. When selecting the Root Disk option, click on the Volume Action dropdown menu. Here you will be able to move the volume to another configured storage, or increase its capacity.
Changing Allocated Resources for a Virtual Machine
Although the process of changing the resources of a virtual machine is the same as an LXC Container, you do have more options and more items to adjust. Navigate to your Virtual Machine and select Hardware from the middle navigation menu to open the resources
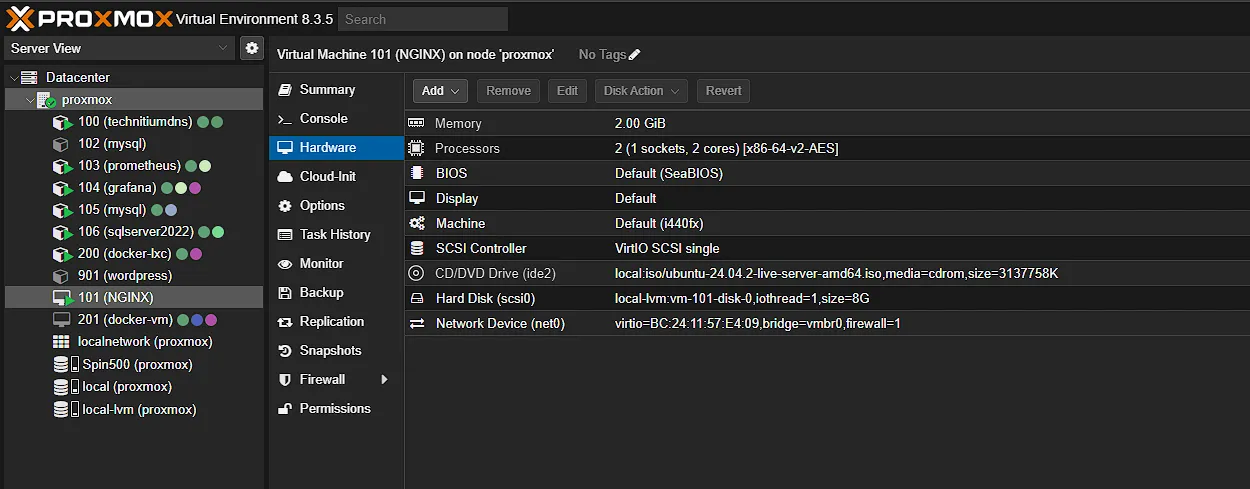
The Memory and Processors settings use a similar edit dialog to the LXC settings, although applying a change to a running VM has different requirements. Select any one of the values and click the Edit button to edit the values. Again the Hard Disk also has the same two options to either move storage, or increase the size of the disk. New options that we have include:
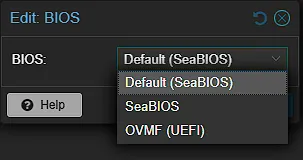
BIOS - The emulated firmware type. This is not a performance adjustment; changing it can affect boot compatibility.
CD/DVD Drive - This might still have the original ISO loaded. You can load any ISO or dismount as you please.
Network Device - To change the emulated networking card. Changing the MAC address or device model can affect addressing and guest driver configuration.
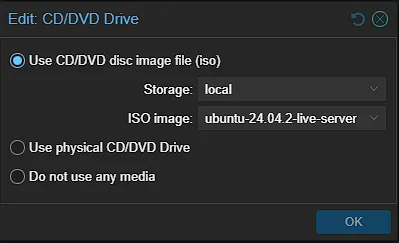
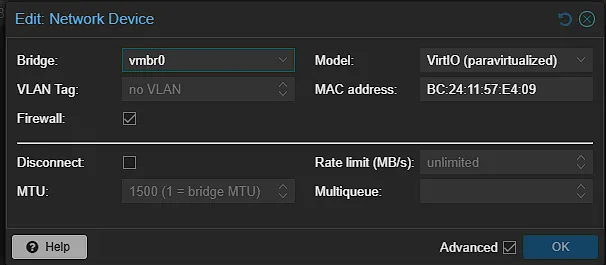
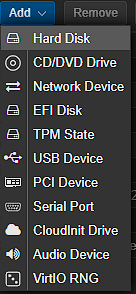
The Add menu contains additional virtual devices, including a secondary hard disk. Adding a new disk is a separate operation from resizing an existing disk; the guest may need to initialize or mount the new device.
Understand Live Changes and Pending Settings
The official container manual explains that many supported changes can apply while a container runs; changes that cannot apply immediately become pending. Check the GUI's pending values and task result instead of assuming every memory, swap or CPU edit takes effect instantly. A swap setting is a limit on host swap usage, not a new swap disk created inside the container.
VM behavior depends on virtual hardware, hotplug configuration and guest support. The official VM manual distinguishes CPU configuration and memory ballooning. QEMU Guest Agent installation alone does not enable memory hotplug. Ballooning, changing maximum memory and adding virtual memory devices are different mechanisms.
If a VM change is pending, plan a graceful shutdown and fresh start through Proxmox as required. A reboot initiated only inside the guest is not always the same as restarting its virtual hardware configuration. Check the resulting guest-visible values and service health before declaring the change complete. Do not lower a memory limit below a workload's actual needs during normal operation.
Distinguish Volume Growth from Guest Filesystem Growth
For a supported Proxmox-managed LXC root volume, Resize can grow the managed volume and perform the applicable filesystem or quota adjustment. Bind-mounted host directories and device mounts are different: increasing an unrelated rootfs limit will not enlarge their backing storage. Verify the actual mount and available capacity inside the container.
The resize screenshot asks for a Size Increment in GiB. Enter the amount to add, not the desired final size. Check the selected disk before confirming. Move Volume acts on the selected volume; it does not by itself relocate every additional mount, external dataset or device associated with a container.
A VM disk expansion enlarges the virtual block device. The guest's partition, logical volume and filesystem may still need growth, unless its own supported automation performs that step. Open the VM console or its SSH session and inspect the guest, not the Proxmox host:
findmnt -no SOURCE,FSTYPE /
lsblk -o NAME,SIZE,FSTYPE,MOUNTPOINTS
df -hT /| Observed guest layout | What to identify before proceeding |
|---|---|
| ext4 on a plain partition | The parent disk, exact partition number and free space after that partition; grow the partition and then its ext4 filesystem. |
| ext4 on LVM | The physical-volume device, volume group, intended logical volume and free extents; grow only the relevant layers. |
| XFS | The backing layout and mounted filesystem; use the supported XFS growth procedure, not resize2fs. |
| Windows volume | The correct disk/volume and usable adjacent unallocated space; use the supported Windows volume-extension tools. |
Optional Example for One Confirmed ext4 Layout
This example is valid only after confirming that the enlarged disk is /dev/sda, partition 2 directly contains the mounted ext4 root filesystem, and suitable free space follows that partition. It does not apply to LVM, XFS, encrypted storage, a different partition number or another device name. Keep a verified backup and stop if your inspection does not match those conditions.
sudo apt update
sudo apt install cloud-guest-utils
sudo growpart /dev/sda 2
sudo resize2fs /dev/sda2
df -hT /
The resize2fs manual explains that filesystem growth does not enlarge the containing partition for you. The XFS growth manual documents a different tool and mounted-filesystem requirements. Some layouts require a planned reboot or an offline procedure; there is no universal no-reboot promise.
For LVM, do not copy an ubuntu-vg name or allocate every free extent without inspecting the actual group and other logical volumes. Prefer the guest distribution's documented procedure for the discovered layout. Run only the procedure that matches the discovered layout; combining commands intended for incompatible layouts can damage the wrong device.
Verify the Change and Keep Recovery Practical
After each change, inspect the Proxmox task log and pending configuration. Confirm guest-visible CPU, memory or filesystem capacity, then test the application that needed the resource. Watch host pressure and storage availability while normal workloads resume. A successful resize task does not prove that the application can write to its intended data mount.
Do not treat shrinking as the reverse of this walkthrough. The GUI growth flow does not provide a general shrink operation. Removing space safely requires filesystem- and storage-specific planning; where appropriate, migrate to a newly sized guest using a verified backup or application-level copy. Restore into an isolated new guest for testing rather than overwriting the only running guest with a generic restore command.
Keep external mount data and application-specific backups in the recovery plan. Proxmox container backups do not automatically include bind-mount contents. Record the revised allocation and why it was changed so future maintenance starts from known values. This preserves the original GUI workflow while making its storage and live-change boundaries explicit.