Proxmox is a powerful yet user-friendly open-source platform that allows users to create and manage virtual environments. It’s mainly used for setting up and running virtual machines (VMs) and containers on a single physical server or multiple servers. With Proxmox, you can run multiple operating systems (such as compatible Windows and Linux releases) on the same hardware without having to buy additional physical machines.
In this guide, we’ll explore what Proxmox is, how it works, its various applications, and the step-by-step process for installing and using it. We’ll also look at the practical use cases and important considerations to help you decide if Proxmox is the right solution for your needs.
What is Proxmox?
Proxmox develops several separate server products. This guide focuses on Proxmox Virtual Environment (Proxmox VE), which combines KVM virtual machines and LXC containers. Proxmox Backup Server (PBS) is a separate backup product that integrates with VE; it is not required to create a virtual machine. It’s designed for data centers and home labs, providing a versatile solution for virtualizing multiple operating systems and services.
The product family includes:
- Proxmox Virtual Environment (VE): The core virtualization platform that allows you to create and manage virtual machines (VMs) and containers.
- Proxmox Backup Server (PBS): A system designed to back up VMs, containers, and even physical servers.
- Proxmox Mail Gateway: An email security solution for filtering spam and viruses.
Install Proxmox VE for the virtualization host. Choose PBS separately if its backup features fit your recovery plan; Proxmox Mail Gateway is an email filtering product rather than part of a normal VE installation.
How Does Proxmox Work?
Proxmox operates on a bare-metal hypervisor setup, meaning it installs directly on the hardware without needing another operating system underneath. The hypervisor uses KVM (Kernel-based Virtual Machine) for full virtualization of VMs and LXC (Linux Containers) for container-based virtualization.
- KVM enables users to run full-fledged virtual machines, where each VM has its own guest kernel and allocated virtual CPU, memory and disk resources. These allocations still share the physical host: assigning more virtual CPUs does not create additional physical cores.
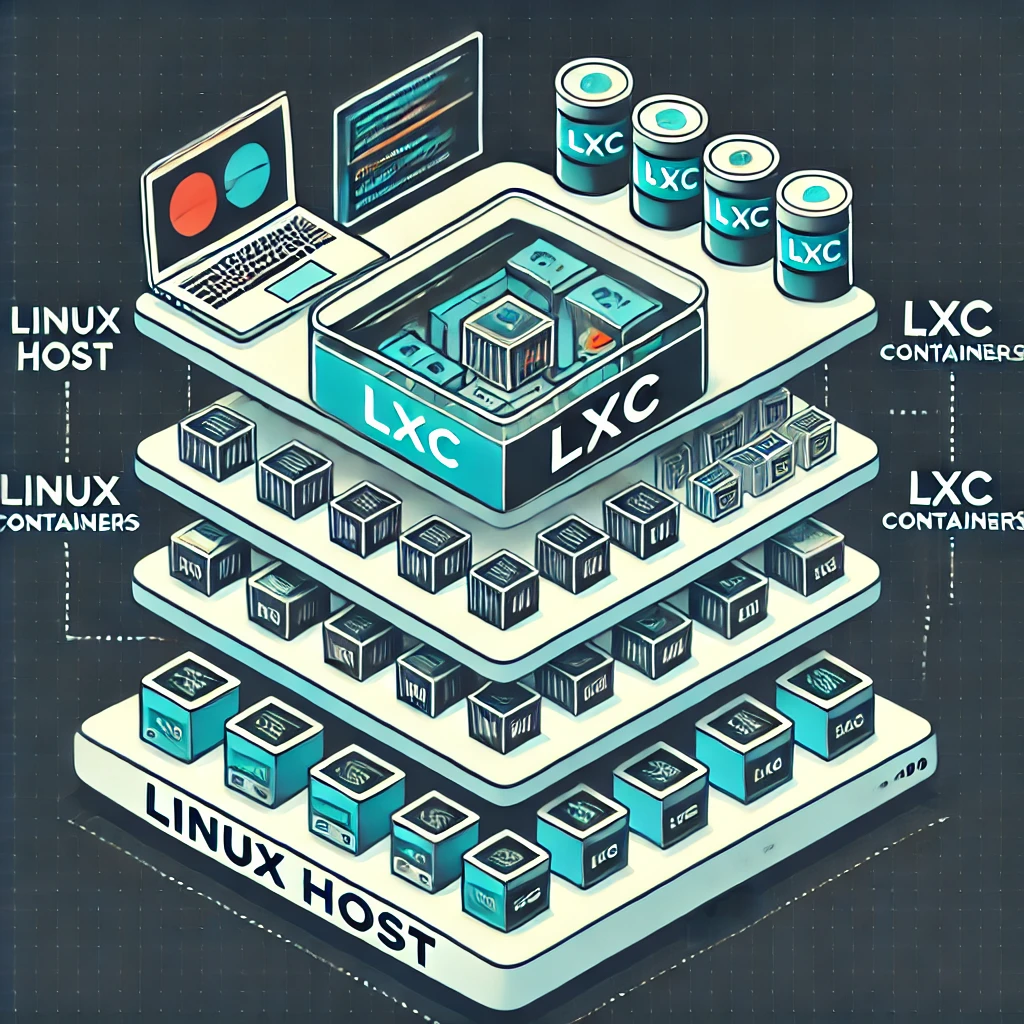
- LXC, on the other hand, allows for lightweight virtualization, where containers share the host's kernel but still have isolated environments. This is suitable for running Linux-based services or applications in separate "containers" on the same physical server.
Different Applications of Proxmox
1. Virtual Machine Management
Proxmox VE is widely used for creating and managing virtual machines. Each VM can run its own operating system and has its own set of virtual hardware resources (CPU, RAM, disk space). This setup is great for running different operating systems on a single machine.
2. Container Management
With LXC containers, Proxmox allows users to create isolated environments for running Linux applications or services. Containers share the host operating system’s kernel, making them lightweight and resource-efficient compared to traditional VMs.
3. Clustering
Proxmox supports clustering, where multiple servers can be linked together to form a unified system. This allows users to manage all their virtual machines and containers from a single interface and migrate compatible workloads between nodes. Migration depends on CPU compatibility, network configuration and access to the guest's storage; attaching a host-specific passthrough device can prevent normal live migration.
4. Backup and Restore
Proxmox includes powerful backup and restore functionalities, especially when integrated with Proxmox Backup Server. You can schedule VM and container backups to configured storage. Snapshots are useful rollback points, but a snapshot on the same failed disk is not an independent backup. Check which guest disks and container mount points are included, and restore a sample backup to verify the recovery process.
5. High Availability (HA)
Proxmox can be configured for high availability, meaning it can automatically detect if a server in the cluster goes down and restart the affected VMs on other nodes. This requires an explicitly configured HA resource, reliable quorum, fencing and another eligible node with enough capacity and access to the required storage and networks. A cluster alone does not enable HA, and restarting a failed workload still causes an interruption. Plan the failure scenarios rather than assuming a single spare server guarantees continuity.
Use Cases for Proxmox
1. Home Labs and Learning Environments
Proxmox is great for tech enthusiasts who want to learn about virtualization and test different operating systems. It can run on relatively inexpensive hardware, making it a popular choice for setting up a home lab.
2. Small and Medium-sized Businesses
For small businesses, Proxmox provides a cost-effective solution to run multiple services (web servers, databases, email servers) on a single hardware platform. It helps reduce hardware costs while improving resource utilization.
3. Data Centers
Proxmox is used in data centers to manage multiple virtual servers. The clustering and high availability features make it suitable for enterprise environments where uptime is critical.
4. Application Development and Testing
Developers can use Proxmox to create isolated environments for testing different applications. The ability to quickly clone VMs or containers makes it easy to test various configurations.
Step-by-Step Guide to Installing and Setting Up Proxmox
Step 1: Prepare the Hardware
- A small learning host might start with 4 GB of RAM, but usable guest capacity depends on the services you run and on host/storage overhead. Choose compatible hardware with virtualization support enabled, sufficient memory for the host plus guests, and storage appropriate to your workload. Check the requirements for your selected release.
- A USB drive large enough for the selected ISO image. Writing the installer will erase that USB drive.
Step 2: Download the Proxmox ISO
- Visit the Proxmox official website and download the latest Proxmox VE ISO image.
Step 3: Create a Bootable USB Drive
- Use software like Rufus (for Windows) or Etcher (for macOS/Linux) to create a bootable USB drive using the downloaded Proxmox ISO.
Step 4: Boot From the USB Drive
- Insert the bootable USB drive into your server and restart it. Press the key (usually F2, F12, DEL, or ESC) to enter the boot menu and select the USB drive.
Step 5: Install Proxmox VE
- Identify the target disk by model and capacity before proceeding: the installer erases the selected drives. Back up anything you need first. Configure the location, time zone, root password, administrator email, management hostname, IP address, gateway and DNS. Use a stable address that will not conflict with the router's DHCP pool. Keep a local console available until network access is confirmed.
Step 6: Access the Proxmox Web Interface
- Once the installation is complete, you can access the Proxmox web interface using a web browser. Navigate to
https://<server-ip>:8006(replace<server-ip>with your server's IP address). - For the initial login, select the Linux PAM realm and use root with the installation password. The default self-signed certificate may produce a browser warning; verify that you are connecting to your own host before trusting it. Create appropriate individual accounts and permissions for ongoing administration.
Step 7: Create Virtual Machines or Containers
- In the Proxmox web interface, go to Create VM or Create CT to start setting up a new virtual machine or container.
- A VM generally boots an uploaded installation ISO or a properly imported disk image. A system container uses an appropriate downloaded container template instead of installing an OS from a VM ISO. Select storage with enough free space, allocate modest resources initially, and test one guest before building a larger collection.
Step 8: Configure Networking
- Set up network settings for your VMs and containers. An ordinary guest can attach to the host's configured Linux bridge. A bridge does not automatically supply a DHCP server or route between VLANs; those services come from your router or other network components. Check the guest's address, gateway and DNS, and retain console access before modifying the host management network.
Considerations When Using Proxmox
- Hardware Requirements: While Proxmox can run on modest hardware, for optimal performance, you’ll need a multi-core processor, plenty of RAM, and fast storage (preferably SSDs).
- Backup Strategy: It’s essential to implement a reliable backup strategy. Proxmox Backup Server can be used to back up VMs and containers.
- Learning Curve: Although the user interface is intuitive, there might be a learning curve for those new to virtualization. It’s helpful to read documentation and follow tutorials.
- High Availability Setup: If you plan to use Proxmox for mission-critical tasks, consider setting up a cluster for high availability.
- Licensing: While Proxmox is open-source, some additional support and enterprise repositories require a subscription.
Conclusion: Is Proxmox Right for You?
Proxmox is a versatile and powerful platform for managing virtual environments, whether you're a home user looking to experiment or a business in need of a cost-effective server virtualization solution. Its ability to support both virtual machines and containers gives it flexibility, and features like clustering and high availability make it suitable for enterprise use.
However, you should consider the hardware requirements, potential learning curve, and backup strategies before diving in. If you need a robust and scalable virtualization platform that doesn’t come with the hefty price tag of commercial alternatives, Proxmox is an excellent choice.
Ultimately, if you’re ready to take on the task of learning and managing a virtualized environment, Proxmox provides a feature-rich, open-source option that can scale from small home labs to large data centers.
Choose the appropriate update repositories
A fresh installation normally enables the enterprise repository, which requires a valid subscription. Without one, that repository can return an authorization error. This does not mean every Debian security update has become inaccessible: the host needs both suitable Debian repositories and suitable Proxmox repositories, and each must be checked.
For a home learning system without a subscription, inspect the node's Updates → Repositories panel, disable the inaccessible enterprise entry and add the official no-subscription repository appropriate to the installed VE release. Check any configured Ceph repository separately; its release must match the supported combination rather than a copied Quincy or Squid example. Keep the base Debian repositories enabled and use the matching Debian codename. Older installations use different repository file formats from newer ones.
Refresh package information and investigate remaining errors before upgrading. Read release notes, confirm backups and allow for a reboot when required. Proxmox describes no-subscription packages as less extensively validated than enterprise packages and recommends enterprise repositories for production. The official repository guidance should be matched to the version you actually installed.
KVM virtual machines or LXC containers?
| Decision | KVM virtual machine | LXC system container |
|---|---|---|
| Guest kernel | Runs its own compatible guest kernel. | Shares the host Linux kernel. |
| Operating systems | Compatible Windows, Linux and other supported guest systems. | Supported Linux userspace templates. |
| Isolation and resources | Separate guest kernel and virtual hardware, with host resources allocated to the guest. | Namespaces, cgroups and permission restrictions; an unprivileged container maps its root account to an unprivileged host identity. |
| Useful starting point | A service requiring its own kernel, appliance OS or a conventional Docker host. | A supported lightweight Linux service that fits container restrictions. |
RAM consumption and startup time depend on the image and workload. There is no reliable universal 30 MB container or ten-second VM guarantee. Keep containers unprivileged where the workload supports it. Hardware access, network capabilities and nested application runtimes can require extra configuration, so do not assume an LXC option offers effortless GPU sharing or the same security boundary as a VM. Choose the documented deployment method for the application, then measure its real resource use.
Useful commands and safe shutdown behavior
The following commands inspect guests without changing them. Run them on the Proxmox host with appropriate permissions and replace 101 with an existing VM ID:
qm list
pct list
qm status 101
qm config 101
pct enter 105 enters an existing container's shell; changes made there affect that container. For a planned VM shutdown, qm shutdown 101 requests a clean guest shutdown. The guest must respond correctly to the shutdown request. By contrast, qm stop 101 terminates it immediately, like removing power, and can damage data.
Do not use qm unlock as a routine first step. Locks protect against conflicting backups, migrations and other tasks; manually unlock only after confirming that the task which set the lock is no longer running. Likewise, importing a disk image merely adds storage: creating the VM, attaching the disk and configuring its boot order are separate steps. Follow the application's current image instructions rather than copying an old Home Assistant filename.
The Proxmox documentation covers installation, virtual machines, containers and HA in detail. Before moving important services onto a new host, confirm that a guest starts after a host reboot, that backups complete, and that you can restore one without depending on the failed original disk.